Showing posts with label elementary. Show all posts

Thursday, January 5, 2012

Memory Maker: Video Interviews with Your Kids!

Aren't we fortunate to live in the age of Flip cams and iPhones and the ability to instantly capture the cuteness of our kids on video for forever memories?! All the sweet little stages and firsts and special events.

One thing I have done with my children from time to time is get one alone where he/she is not distracted, and ask some questions...just to capture their thoughts on video. The other day I took my oldest two outside and asked them each about 10 questions on the topic of Money. From some recent dialog, I knew my daughter did not have much financial understanding yet, and some of her answers proved to be pretty entertaining. They will both get a kick out of this a few years down the road!


You can have a lot of fun with this simple format...and provide some wonderful videos for long-distance family! I plan to interview my kids about growing up, goals, Daddy (Father's Day!), grandparents, siblings, work/jobs, family, and vacations. 

For kids who are a little camera-shy, try sitting a few feet to the side of the camera as you talk to them. If they are looking at you, that may help them forget the video and more freely answer your questions. A few other quick tips:
1) Use a tripod! You can get one at Walmart for as little as $20, and it's well worth the investment for nice, steady video.
2) Set the camera at their eye level. Don't "shoot down" at them.
3) Sit or kneel as you interview them so that you are on their eye level as well.
4) Frame your shot fairly tight--usually waist or chest-up is good.
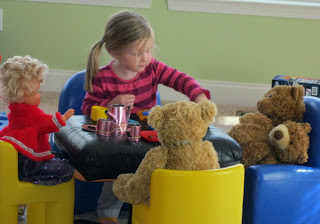
5) Try shooting outdoors for better lighting and more scenic setting (the trade-off is background noise if you live on a busy street).
6) Ask open-ended questions--have 10-12 ready since they may pass on a few of them.


It's not hard to edit their answers together and make them fun to watch--if you don't already have an editing program, you may find Windows MovieMaker is easy to learn. It is a blast editing--and later watching--these priceless videos starring your favorite little actors!

I plan to do these videos on a more regular basis this year, so my goal is to interview my kids each month on one topic. Look for our February edition..."Kids on...Love!!"


Monday, December 12, 2011

Free Printables: Pen & Paper Games!

So many exciting events, programs, and parties during the Christmas season. Not to mention shopping and appointments and road trips to visit family. Some of these can get a little long or tedious for children to sit through. Once the candy cane is crunched away, the doodling page is full, and the Christmas lights have lost their dazzle, these pen & paper games may help ward off the wiggles for a little longer!


The first game is a Scattergories type word game...scan the room for objects that begin with each of the letters, MERRY CHRISTMAS. Can be a competition with points scored for the number of letters in each word, and extra points for double words! Print it here.


Gingerbread Squares is a game you may remember from childhood. Requires 2 or 3 players, and they take turns drawing lines to connect the gingerbread men. Whoever forms a box with their line gets to put their initial inside. This is a great game to teach strategy to preschoolers--my 4-year-old loves it. It can be printed here.


Print a couple off and stash them in your car for some quick entertainment when an event or appointment drags out longer than expected!

Friday, September 2, 2011

MORE Printable Shopping Games!

My kids really loved the shopping games we tried last week, so I put together a couple more that had to do with rhyming.


The child must identify the picture and then watch for something at the store that rhymes with that object. For instance, SHIP would rhyme with DIP or CHIP. For HEAD, they may find BREAD in the bakery. I have two versions of this printable that can be cut apart into two games each. One is geared for a Grocery store and one is for shopping at a department store or mall. It has items like FIRE (tire) and NURSE (purse).


Hopefully these will keep the children happy while Mom shops some great Labor Day sales!

Thursday, August 25, 2011

Make Shopping Fun for Kids...Printable Games!

Oh, nothing brings on fatigue and despair in my children like the announcement, “Time to run some errands!” The skipping feet immediately begin to drag and the little shoulders slump out the door. I believe horrid and boring are the descriptive adjectives for shopping that I've heard mumbled from the backseat.

I really think they would gladly bathe twice every day and color with broken crayon stubs the rest of their childhood in exchange for never going shopping again.


In an attempt to make errands less of a drudgery for them, I made up a couple of little printable games that could be carried along to the stores. We tested it out this morning and I believe my little focus group enjoyed themselves--there was not one whine the whole trip! 


We used the colorful clipboards made here earlier this week (sidenote: after three days, they are still excited to check off their chores each morning! Musta got my list lovin' genes!)


Since my 4-year-old really loves I Spy, I made a little pictorial version for her to find several objects at a store—tried to think of things that were not too obvious--a hat on someone's head, a bee (honey label), etc. 


It's available if you'd like to print it here...you just need to set up a free Scribd.com account. (This is the only way I know how to make a printable available—I wish I knew how print it from our site). If you're artistic, you could easily draw your own objects, or cut pictures out.


Color Hunt would also be great for a preschooler. Use a crayon or colored circle stickers to mark 5-6 colors on a paper. Then give your child the clipboard and a pencil at the store so they can draw or write in an object they see beside each color. Yellow - draw a banana, red - can of tomato soup. The printable for this one has a more challenging version too, incorporating a sensory descriptive word: White + cold, Red + smooth.


My first grader is loving math these days. A Price Hunt math game with a calculator kept him very happily occupied. He had to find the grocery items on his list, note the price, and then calculate the cost for the 2 of them, or 3, or whatever # was indicated.


 I made a printable version of this...but for variation, cut pictures out of a grocery flier and glue them on a paper. The best part, of course, is using a calculator! I used rubber bands to hold it to the back of the clipboard. A dollar store calculator could be superglued to the back of the clipboard, or attached with velcro so it's removable.


For kids who can spell, try an Alphabet Hunt. Write the alphabet out in a couple of columns with a space beside each letter. Your child must find something at the store that starts with each letter. Stick to alphabetical order for more of a challenge if you have several shopping stops!

If you have no time to make a game, one quick thing I've done before when we've had to hit several stores is to give each child a few coupons and tell them their Mission is to be the first to find the product pictured. 

Grocery shopping accomplished and a good time had by all.


Shared with these great blogs:
I Can Teach My Child


Monday, August 8, 2011

Imagination Booster: Creative Paper Dolls!

Last week we made some fun paper doll furniture that was inspired by my creative grandma, and the creative mess is still littering my entire dining room. The kids have LOVED everything about this project--the tutorial can be found here.  Today we finished up a few paper dolls to help fill the spaces we created last week.  


To get started with my grandma's original paper dolls, you will want to start collecting ads that contain large images of people/models, such as Target, Kohl's, etc. from your Sunday paper.  If you really want your kids to have an unlimited supply of doll-people and clothes, I would suggest going to a place that still carries gigantic catalogs, such as JCPenney, and either offer to buy one or ask if they have any old or outdated versions lying around. When I made these dolls as a child, we used the Sears and JCPenney catalog and our options seemed endless.


Next, get started choosing your family and cutting them out! Your kids will have fun choosing, and if they're anything like my daughter, the family will probably end up with about 20 babies and kids.  Once your family is complete, you can try to find shirts, jackets, and even shoes that you can cut out (the kids might need help with this!) with tabs on the side that you can fit over your dolls for a temporary wardrobe change. If you want to make it simpler and more permanent, just let them glue a new outfit on top of the doll. If you want to give a little more permanence to your dolls, just glue them to a piece of card stock or heavy paper and cut the outline again. I did this with several of my daughter's favorites.  She also had a lot of fun choosing purses and plenty of accessories. It is such a simple idea, but it is a fun way to open up their creative minds through imaginary play because the options are almost endless. 


You should be able to find plenty of little outfits!
My daughter loved the "beautiful dresses" that this model was wearing :)

I cut out an outfit on the same page of this little girl and secured it with two small tabs. It was a perfect fit!


To take this a step further, I also decided to put a twist on my grandma's idea by making a doll for each of my kids. I took a picture of them (in retrospect I would have had them hold their arms out a little wider!) and printed it on thick paper.  Of course our printer ran out of ink today, but you get the idea and the kids were THRILLED to see themselves in doll form.  Once they were cut out, I decided to trace their outline and make a few clothes out of the many watercolor works of art we had sitting on the table. I cut out tabs and it was good to go. It worked just like a paper doll dress and even looked surprisingly cute!


To make extra clothes, trace your "doll" onto any kind of paper, give it some tabs, and the wardrobe is endless!
Hopefully this idea will jump start many other creative spins on the homemade paper doll in your own home. Sometimes we might feel like it's hard to compete with the TV and fast-paced toys scattered throughout our home, but this is one project that held the attention of my little girl for a long time, and something I remember doing as a little girl for hours and hours on end!

Wednesday, August 3, 2011

Imagination Booster: Paper Doll Furniture

When I was little I used to love going to my grandma's house, not just because the cookie jar was always full or because I loved the smell of coffee even when I was 11, but because she always had fun and creative ways to play together.  My innovative grandma was a second grade teacher for over two decades, and always had amazing stories since she grew up as the baby in a family with no father during the Great Depression. To this day, one of my fondest memories is creating paper dolls and paper doll furniture with my clever grandma from scraps around her house.

To make your own Depression Era paper doll furniture, start collecting boxes from around the house. You will only need a few cereal and/or food boxes to get started. I also saved some of my son's birthday cards to make a few colorful pieces. Anything that is made from thin cardboard material will work.  You will also want to have scissors, scraps of felt or material and any old magazines or catalogs you may have lying around.
This craft is geared towards older kids who can cut and glue well, but younger kids will also enjoy playing!


To make a simple table, cut your cardboard in the shape of an "H" then fold the legs down.

Finished Table made from an old birthday card!
To make your couch, take a large rectangular piece, fold it in half and cut slits in the middle. Then fold down and up- voilà. Couch!
Next, I cut up a few felt pieces to make a bedspread and pillows.
To make a chair, follow the instructions on the couch, only make it half the size!


To finish decorating your room, the possibilities are endless. I like to keep old issues of Pottery Barn, for example, and the pictures are perfect for decorating. If you like to play with Mod Podge like I do, then you and your big kids will have lots of fun cutting, gluing and decorating to their heart's content.  You can break out paint, stickers, cotton balls, anything! 
I used large cereal boxes for my walls here, but another option is to glue walls onto file folders or sturdy folders that you can use to create a space for your furniture. The folders also double as storage if you want to keep your room design for longer than just a few hours!

The final step is to make  your very own paper dolls from catalogs and/or printouts, but we will save that for another day. In the meantime you will notice that Taylor Swift and a Yoga friend stopped in to see our Paper Doll room.  They had a great, relaxing time in our creative new living space!  

Monday, July 11, 2011

Coffee Can Stilts. Or Tuna for Beginners.


This scene totally speaks childhood memories to me. My dad made us kids tin can stilts and wooden stilts, and we had a pogo stick...all of which made for hours of fun on warm summer evenings.


These stilts were super quick to make. I actually found a couple of old coffee cans in our basement...not quite the same size, but close enough. A good coat of spray paint quickly covered the dingy, slightly rusty cans. For my preschoolers, tuna cans seemed like a more manageable size.


Any wider can will work...try pineapple juice or large tomato sauce cans that can be emptied without cutting the bottom off. Just punch a hole in each side near one end with a metal pointy can opener or a drill. Then empty the juice, rinse out the cans really well, and paint them if desired. Rope handles should loop through the holes and knot inside the can, and should be cut long enough so your child is holding them about waist level.


The only thing I bought was the poly cord from Lowe's--it's smooth and a good thickness for little hands to hold onto. It was $3.


We had fun trying the different size stilts and seeing how fast we could walk. My kids want to make another tuna can set so they can race.


Ahhh...walking tall on tin cans...it was stilt fun after all these years!


Wednesday, July 6, 2011

Felt Animal Bookmarks


We needed a little project this morning to help ward off the post-vacation grumpies. Seeing as we are a little bit behind in our summer reading goals, I thought some friendly felt critters might beckon the kiddos into books again. So out came the felt and glue and scissors to make some bookmark animals.


I made up some patterns for a mouse and elephant...if you (like me) do not have super-great drawing skills, try finding inspiration in kids' books, coloring books, or google images of clip art. Some basic circle, triangle, and oval shapes can be used to make up all kinds of whimsical animals.


We cut out our felt pieces, used craft glue to assemble them, and added whiskers & tails using some rafia cord (or try thin ribbon, embroidery thread...whatever you have around).


Finally, a long strip of felt was added to make it bookmark-ish. So cute!


Okaayyy, we're off to tackle that pile of library books we haven't finished yet!

Linking to these great parties:

sugaranddots
gingersnapcrafts
keepingitsimple

Wednesday, June 22, 2011

Adding a Little Drama to Reading Time

The bedtime ritual in our house pretty much always includes reading. When I had my first baby, a wonderful doctor told me how she read to her sons for 10-15 minutes before each nap and bedtime. She advised me to try it as it made naps a time children would look forward to, rather than dread. It has worked famously! My kids willingly run to the bedroom to choose their story before an afternoon nap. And they are verrrr-y disappointed when we get home too late at night and have to kibosh their story time.

We began this nap/bedtime routine by reading simple board books to our babies when they were 11-12 months old. Now with our two older children, we sit on the floor in their bedroom and read before bedtime. I don't think any of us will outgrow it anytime soon!

Having this routine in place helps this Not-so-scheduled-Mommy make sure we get around to giving our children those 20 valuable minutes of daily read-aloud time. Now with a more laid-back summer calendar, it's great to add a little more reading time some days. Especially with rewards offered through Summer Reading programs at the local library!


I was reminded this week of some dramatic enhancement I could bring to reading time. Most college notes have been long-since tossed, but one file I saved was from my Drama with Children class. Incorporating drama with children's literature helps children better understand and interpret what they are reading or hearing. There's lots more in my notes, but just know it's helping with Important Life Skills. I promise.

This is an easy technique that can be done with any short story that has several characters or important elements. You choose 3-10 words in the story (depending on how many participants you have) and make up a short phrase or action for each. Then assign each action to a child (or group of children). Have a practice time for them to respond to your Cue words with their parts, so they will be ready when you read the story.

We tried it with the story of Joseph in the Bible. I gave each of my kids a character, had them practice their lines, and then read the story aloud while they each did their part.

Joseph Sold by His Brothers - Genesis 37


Joseph - hold pretend coat lapels, say “The Lord is good”
Jacob -
strokes beard, shakes head saying “Oh, my sons”

Brothers -
cross arms, scowl, and say “Not fair!”
Reuben - shake finger, say “No, no, no”

Ishmaelites -
point finger, say “Carry this, carry that”
Coat of Many Colors - (ALL) stroke sleeve, say “Ahh, nice”

The book of Genesis tells the story of a man named Jacob who
had many sons. He loved his son Joseph the most and gave him a coat of many colors. The other brothers hated Joseph because Jacob loved him more. Joseph even had dreams that his brothers bowed down to him. When he told his brothers, they hated him even more. One day, Jacob sent Joseph out to check on his brothers, who were out in far-off fields watching the flocks. When his brothers saw him coming, they made plans to kill Joseph. But brother Reuben heard the plans, and he stopped them. Reuben told them to not kill Joseph, but rather to put him in a deep pit. When Joseph came close, they pulled off is beautiful coat of many colors and threw him down in the empty pit. Later, when the brothers sat down to eat, they saw some Ishmaelite people traveling by on camels on their way to Egypt. “Come, let us sell Joseph to the Ishmaelites,” they said. So they sold him for 20 pieces of silver. When Reuben later returned to the pit to rescue Joseph, he tore his clothes in sorrow, for the boy was gone! The wicked brothers then took the coat of many colors and dipped it in the blood of a young goat. They brought the coat to their father, Jacob, who thought an evil beast must have eaten his son. He did not know that Joseph had been taken to Egypt as a slave and sold to one of Pharoah's officers. But God knew, and He had great plans in store for Joseph.


This could be a fun technique to implement next time you are watching a group of children or teaching a class. For some helpful, easy-to-implement tips on guiding and improving your child's reading skills, check out the School Marm.

Bring on the drama, kids!

Monday, June 13, 2011

Making Homemade Stickers


I've seen several recipes around for making homemade stickers and finally got around to trying it. It's super easy and combines a couple of my kids' favorite activities: cutting with scissors and licking things. Sounded like a winner for a Monday morning craft!


We gathered a couple of magazines, animal wrapping paper, and some scrapbook paper & punches, and I set my children to work cutting out pictures.

Now we needed “edible adhesive” to turn the pictures into stickers.


I combined:
1 packet of unflavored gelatin
4 TBSP boiling water
½ tsp corn syrup
½ tsp vanilla extract (or other flavoring)
Another option: If you have a box of regular Jello around, try mixing 3 TBSP of the flavored gelatin powder with 1-2 TBSP boiling water. Add ½ tsp corn syrup if you like.


My kids used small paintbrushes to paint the gelatin onto the back of the stickers. We lay them on plastic cutting boards to dry. They will curl up a little. A half-hour later, they were ready to lick and stick.


We stuck the leftover stickers onto wax paper to use another day. Also, we found we could reheat the bowl of gelatin in the microwave or a double boiler when it started to get thick and gummy.

We'll definitely be doing this again some rainy day. It was a big hit at our house.

Wednesday, June 8, 2011

Potato Stamps & Tea Party Napkins

My little girl loves a good tea party. She enjoys serving up delectable snacks on her play dishes, but doesn't have much of a linen closet to pull from when her dollies and bears come to tea.


If I was ambitious, I might have cut and hemmed some cloth napkins in little girl size. Instead I rummaged through a drawer to see what I already had around. Oh, happy day—the bottom back corner of a linen drawer revealed a set of 4 beige napkins that have not been used in ages. Umm, apparently because of the multitude of stains that were discovered in better light when I ironed them. Embarrassing!! Well, never mind, Sad Little Napkins. You're perfect for a potato stamping project, and you'll soon be party-worthy once again.


To transform our Tea Party Napkins, I gathered these other materials: paring knife (or exact-o knife), pen, cookie cutter (optional), potato, fabric paint (we used Tulip brand), craft paint brushes, paper bowls, painting clothes for kids.


The first step was to wash a potato and cut it in half. For one half, we pushed a metal cookie cutter into the potato and then used a paring knife to cut away the excess around the cutter, leaving a perfect heart shape. The other half we tried freehand. I etched a paisley shape on the potato with a pen and then cut away ¼-inch of the potato to leave a raised stamp. If you want to make a monogram letter or number, just be sure to draw it backwards since it will be mirrored when stamped.


Fabric paint is permanent and will bleed through the napkins some, so be careful to protect clothes and furniture. I put my kids in Daddy's old t-shirts, and the stamping fun began. To keep the paint even and the potato less messy, we brushed the paint onto the raised stamp. The kids practiced stamping on paper first, then worked on the cloth napkins.


The paint requires 24 hours to dry. Meanwhile, my daughter is anxiously awaiting...I hear her rustling through the pantry for some party food to serve up once her lovely napkins are ready for use.