Showing posts with label painting. Show all posts

Wednesday, December 7, 2011

*Our 100th Post! Original Painting Giveaway!*

cel·e·brate [sel-uh-breyt] commemorate occasion, achievement
This is a special day for us. The Christmas season is already in full swing and now, to top it all off, today marks our 100th blog post.  When Kylee and I joined forces to start this blog last April, we blindly entered the world of mom-blogging, hoping we wouldn't get "blogged down" in the process. So far we have learned a lot, met many great moms and received lots of encouragement from you all. We are feeling very blessed!

In order to officially toot the ceremonial horn on this special day, we are offering this fun giveaway.  Our goal is to reward our current friends while also meeting many more new friends.

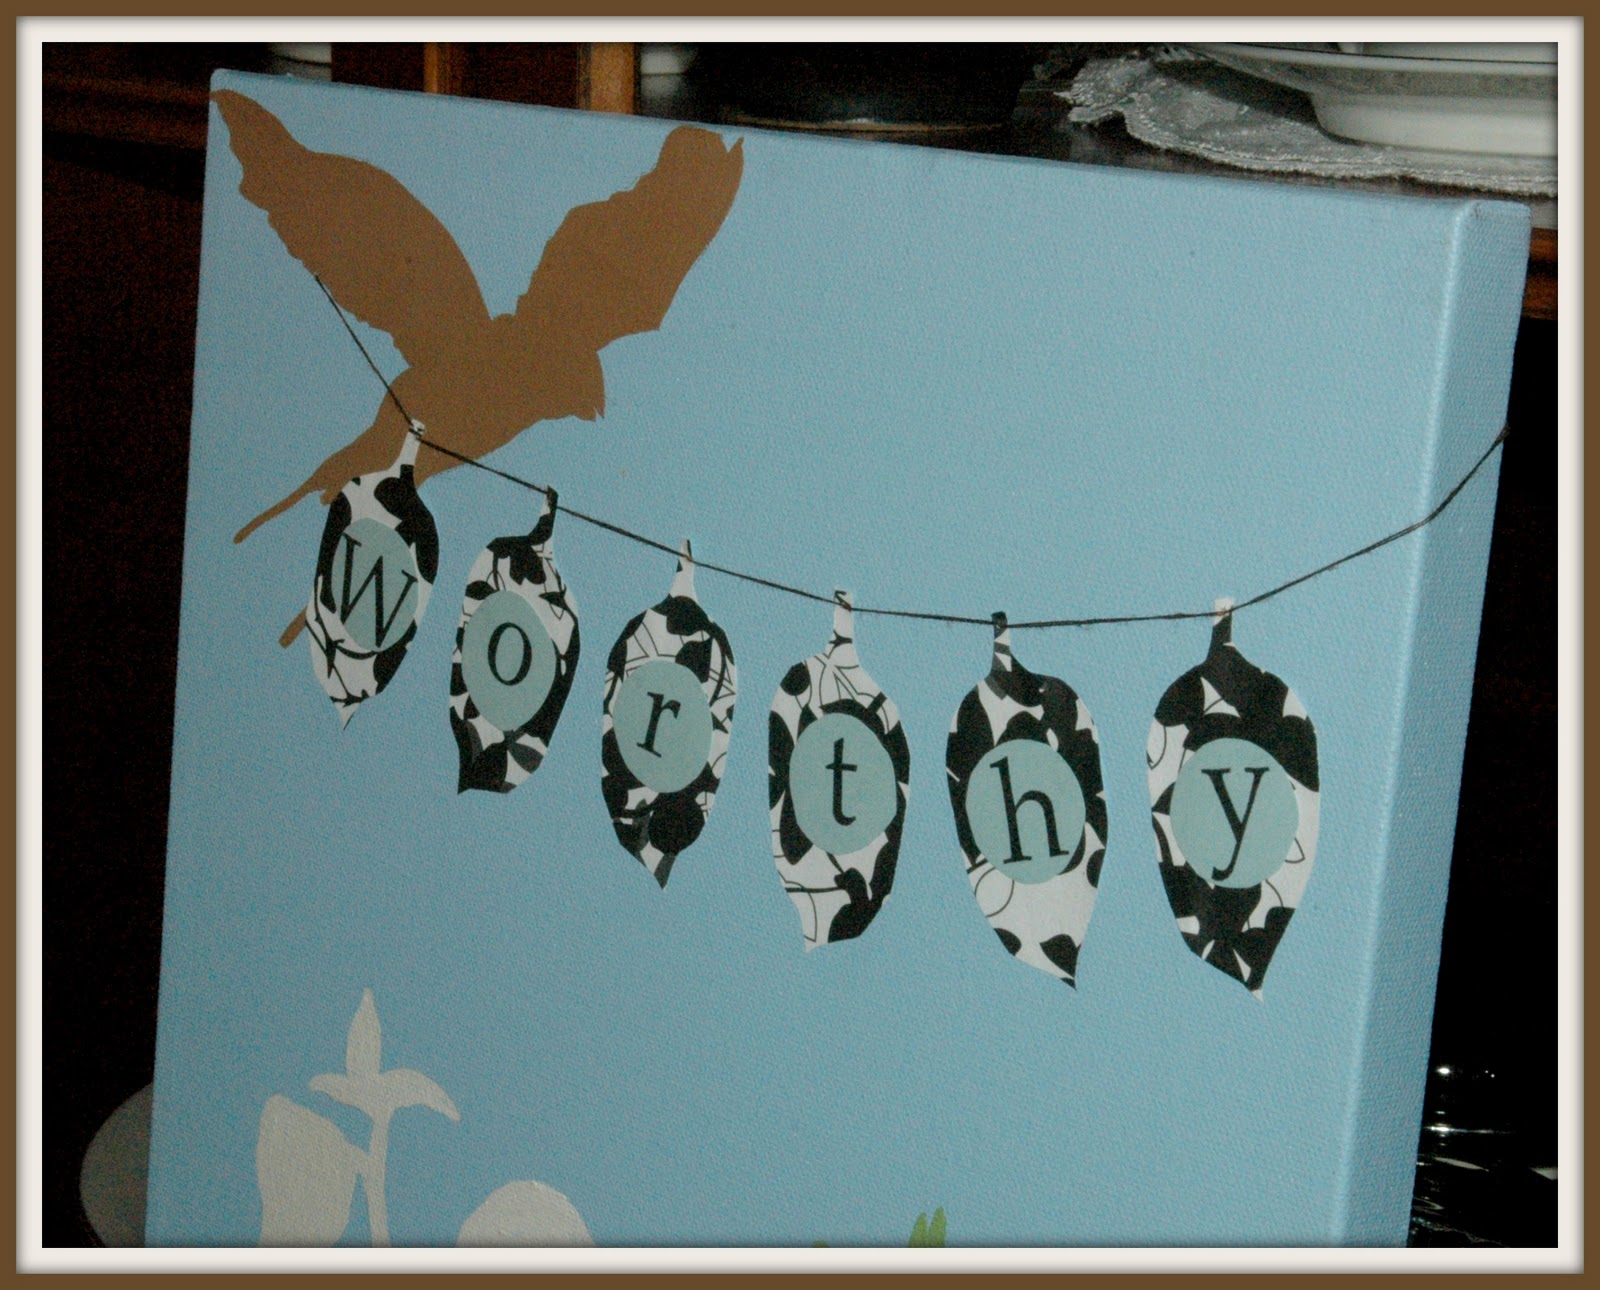
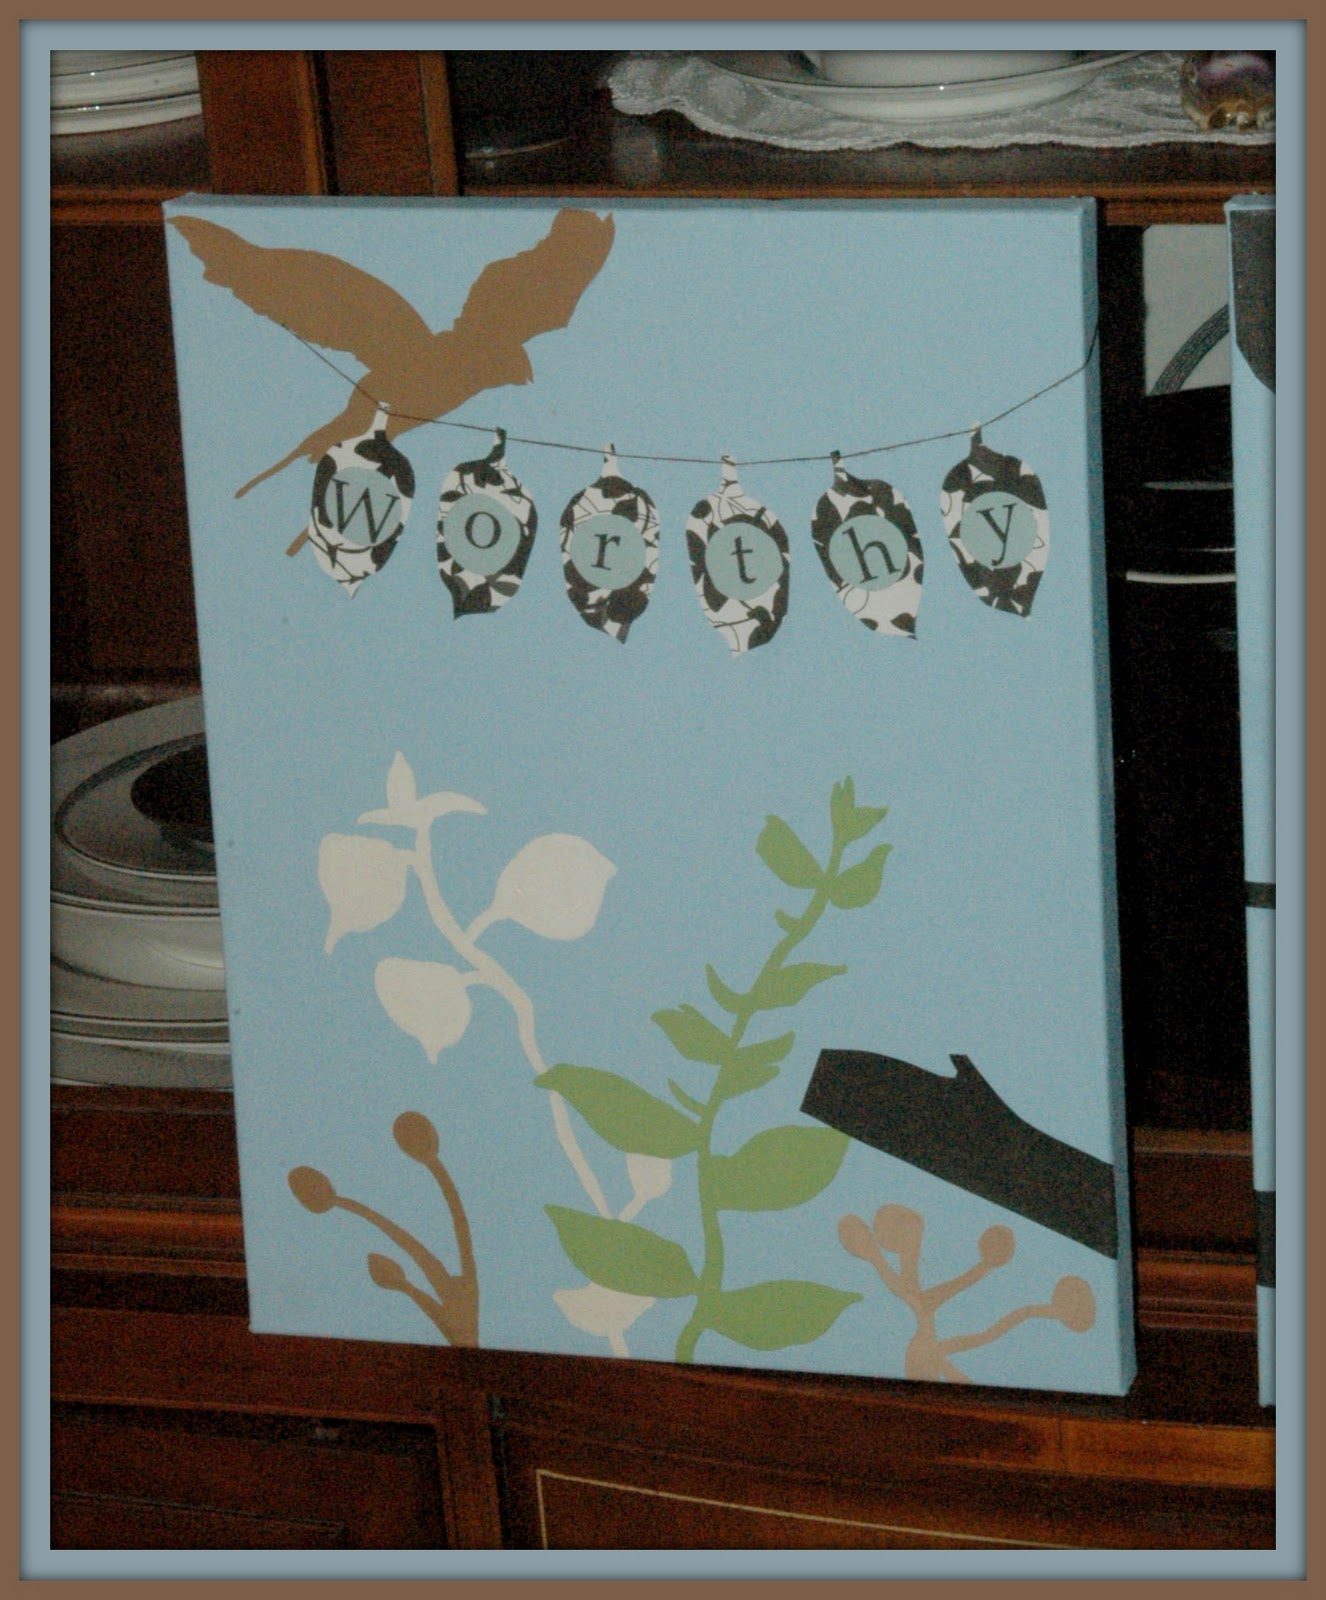
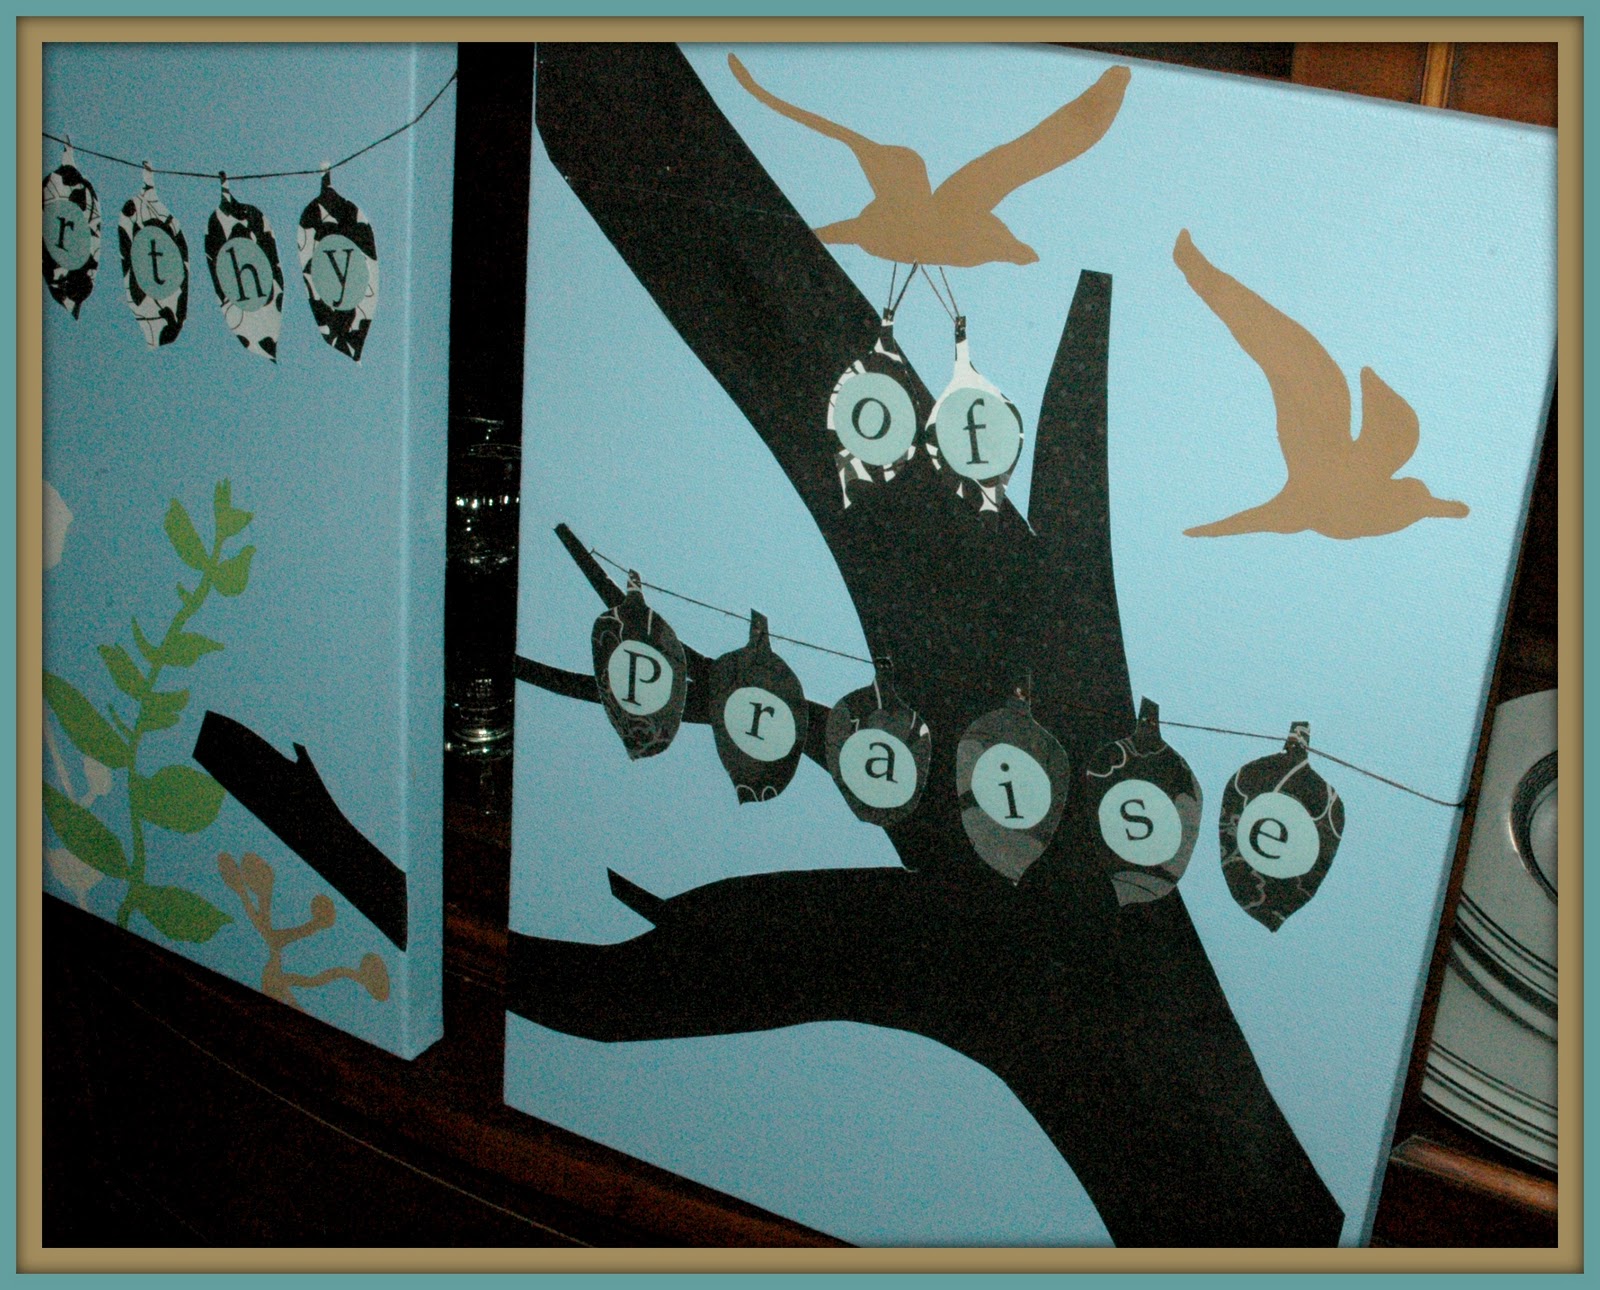
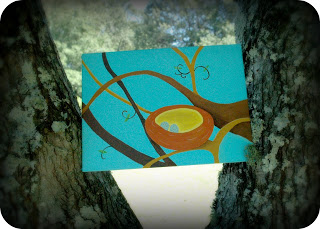
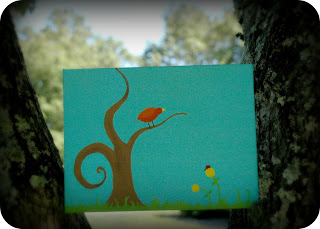
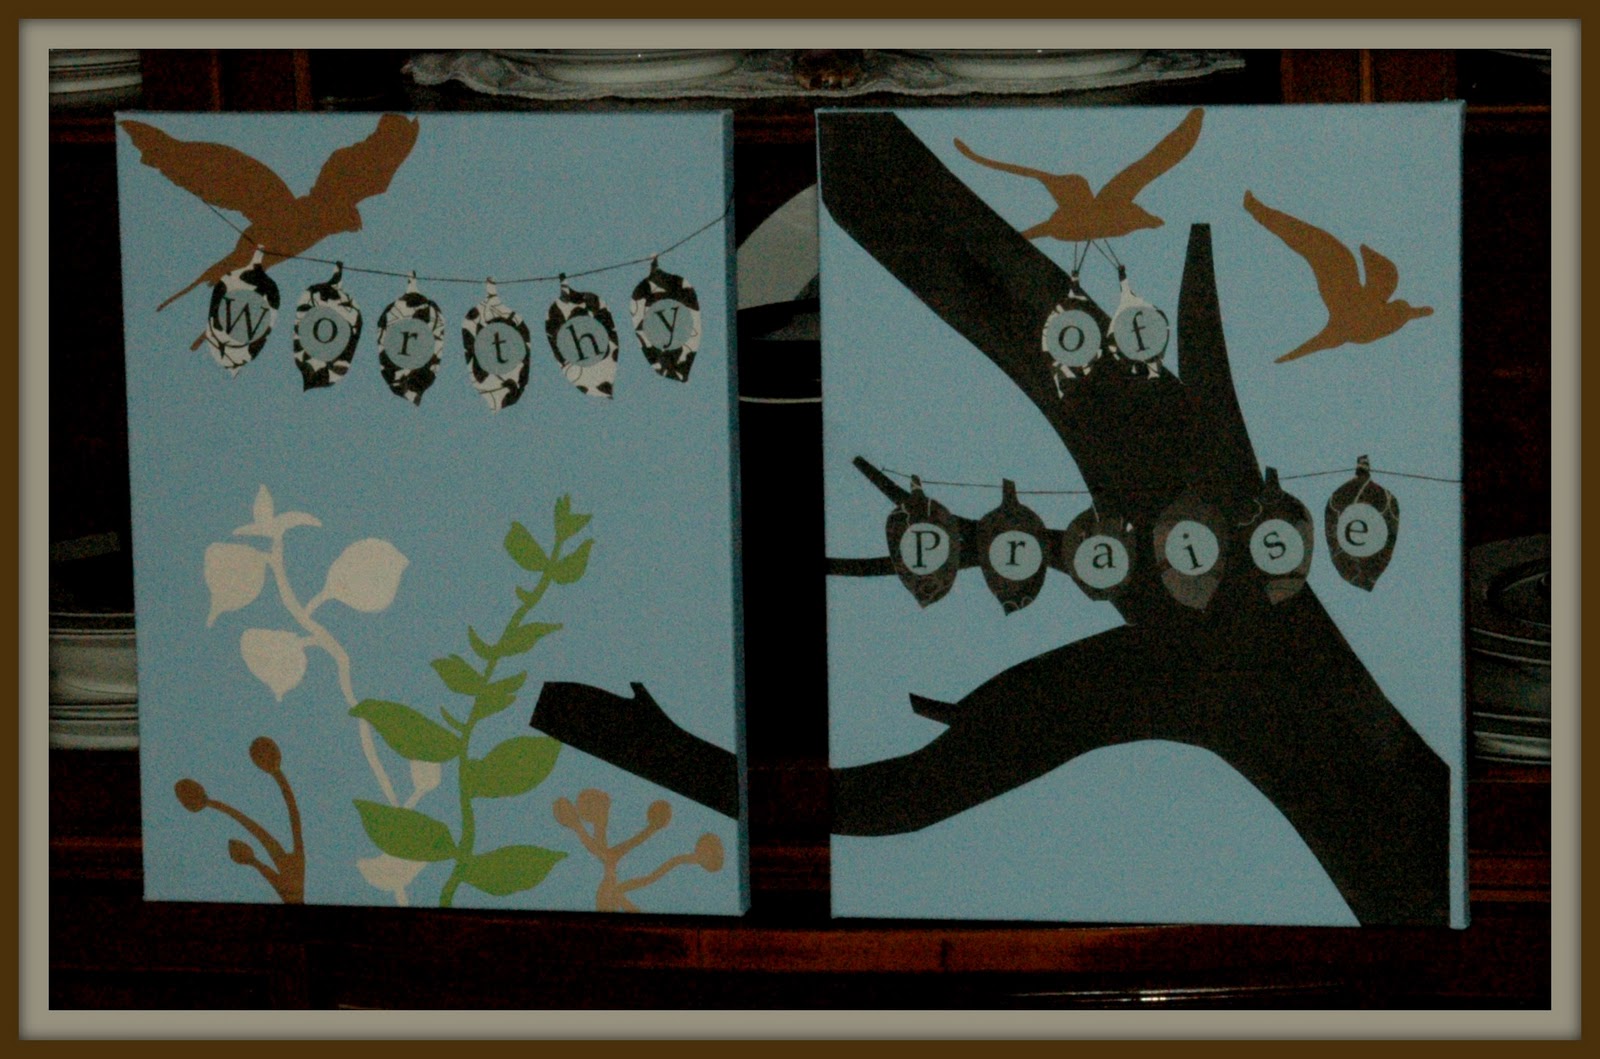
We are offering 2 large (11X14 each) original acrylic paintings on canvas.  These paintings were designed and created by me (Tara) and contain a background acrylic painting, paper details (tree and words), as well as thread which is hand sewn into the canvas to attach the letters.

Here are a few more detailed images:


Here are the Rules!
  • We are in love with you, our current fans, but we would love to see our infant blog grow even more.  Our challenge is to spread the word about us to your friends and family--we'd love to meet many new great folks just like you.  If you are already a member on our blog, then you already have an entry to win!
  • Once our members on this blog reach the magical number (100) we will randomly select 1 fortunate fan and ship these paintings straight to you (as long as you are a U.S. or Canadian resident!)
  • Don't like those odds? Better your chances to win something by commenting on this post and you will automatically receive an entry to win our second place prize.  Do you love Amazon.com? So do we.  Comment on this post and receive an entry for a $10 Amazon gift card. It's that simple.
The winners will be chosen when our blog members number has officially reached 100 so keep checking back regularly!  We are thankful for you and hope you enjoy many special memories with friends and family this season!

Wednesday, November 16, 2011

Quick Craft: Craft Stick Puzzle


This is the cutest and easiest little puzzle idea! I've seen it in a couple of places and decided to give it a try. You may have the supplies already on hand: craft sticks (I used the wide ones), acrylic craft paints (or paint pens), brushes, masking tape, and a marker.


For my pictures, I searched online for Fall clipart image and printed out a few.


Line up 7 craft sticks tightly together and tape diagonally across the back.


Turn it over. Now you can either paint a background color, or leave the background natural and trace your shape with a marker.


The fun part: painting! I went with larger, simpler pictures since I didn't have a fine paintbrush or paint pen to work on small details. For younger children, you probably want pictures with more obvious detail (jack-o-lantern face would be easier than plain pumpkin). I outlined them with a black permanent marker again when they dried. My daughter could hardly wait to test them out after breakfast.


Wouldn't these be great for kid favors or busy activities at the Thanksgiving table? Or tuck a set in your purse for entertainment at a restaurant or appointment.
My kids saw the turkey pattern and are begging for it on a puzzle...I'm off to find a smaller paintbrush!


Tuesday, September 13, 2011

Giveaway! Set of two Acrylic Paintings via I Can Teach My Child!

We are wrapping up our Teepee giveaway here, but never fear! We have another great opportunity for you to win something this week. Our friend at I Can Teach My Child is sponsoring a giveaway this week that includes two coordinating paintings that I (Tara) created. 


If you want a chance to win the paintings, the details are all right here. Thanks, and once again, Good Luck!

Wednesday, June 8, 2011

Potato Stamps & Tea Party Napkins

My little girl loves a good tea party. She enjoys serving up delectable snacks on her play dishes, but doesn't have much of a linen closet to pull from when her dollies and bears come to tea.


If I was ambitious, I might have cut and hemmed some cloth napkins in little girl size. Instead I rummaged through a drawer to see what I already had around. Oh, happy day—the bottom back corner of a linen drawer revealed a set of 4 beige napkins that have not been used in ages. Umm, apparently because of the multitude of stains that were discovered in better light when I ironed them. Embarrassing!! Well, never mind, Sad Little Napkins. You're perfect for a potato stamping project, and you'll soon be party-worthy once again.


To transform our Tea Party Napkins, I gathered these other materials: paring knife (or exact-o knife), pen, cookie cutter (optional), potato, fabric paint (we used Tulip brand), craft paint brushes, paper bowls, painting clothes for kids.


The first step was to wash a potato and cut it in half. For one half, we pushed a metal cookie cutter into the potato and then used a paring knife to cut away the excess around the cutter, leaving a perfect heart shape. The other half we tried freehand. I etched a paisley shape on the potato with a pen and then cut away ¼-inch of the potato to leave a raised stamp. If you want to make a monogram letter or number, just be sure to draw it backwards since it will be mirrored when stamped.


Fabric paint is permanent and will bleed through the napkins some, so be careful to protect clothes and furniture. I put my kids in Daddy's old t-shirts, and the stamping fun began. To keep the paint even and the potato less messy, we brushed the paint onto the raised stamp. The kids practiced stamping on paper first, then worked on the cloth napkins.


The paint requires 24 hours to dry. Meanwhile, my daughter is anxiously awaiting...I hear her rustling through the pantry for some party food to serve up once her lovely napkins are ready for use.