Showing posts with label imagination. Show all posts

Wednesday, March 21, 2012

Creativity Corner: Art in the Sky.

I have always been mesmerized by clouds.  
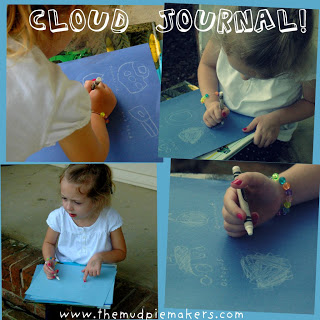
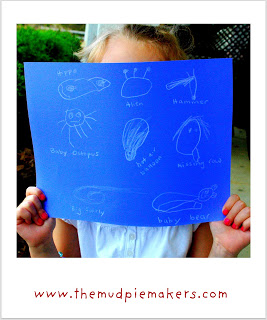
Before I became aware that lying on my back in prickly grass would result in dirty clothes or bugs-in-hair, I would gaze for hours up at the sky.  The cloud-object game has been around forever, but to my 5-year-old, it was a completely new phenomenon.
Our recent cloud-gazing adventure was a wonderful activity and I really enjoyed sharing it with her!
Springtime is one of the best times to hunt for clouds.  I took Maddy on the front porch so we would be slightly shielded from the sun, but we also had a great view of the open sky.  This activity would also make a great field trip--literally, to a field! Or a park. At any rate, we headed to the front steps armed with several sheets of blue construction paper, a few white crayons and white pencils, and our best seeing eyes.
At first we simply sat on the porch and talked about what we saw.  The sky was so blue and the clouds were perfectly white and fluffy... it was easy to get started.  In the beginning, Maddy described the clouds without much creativity:  A bush.  A ball.  A splotch.  I tried to offer suggestions to help her use her imagination to SEE things differently and she quickly got the hang of it.  Once she figured out how to play, she couldn't get her pencil to paper quickly enough, and she was loving it! 
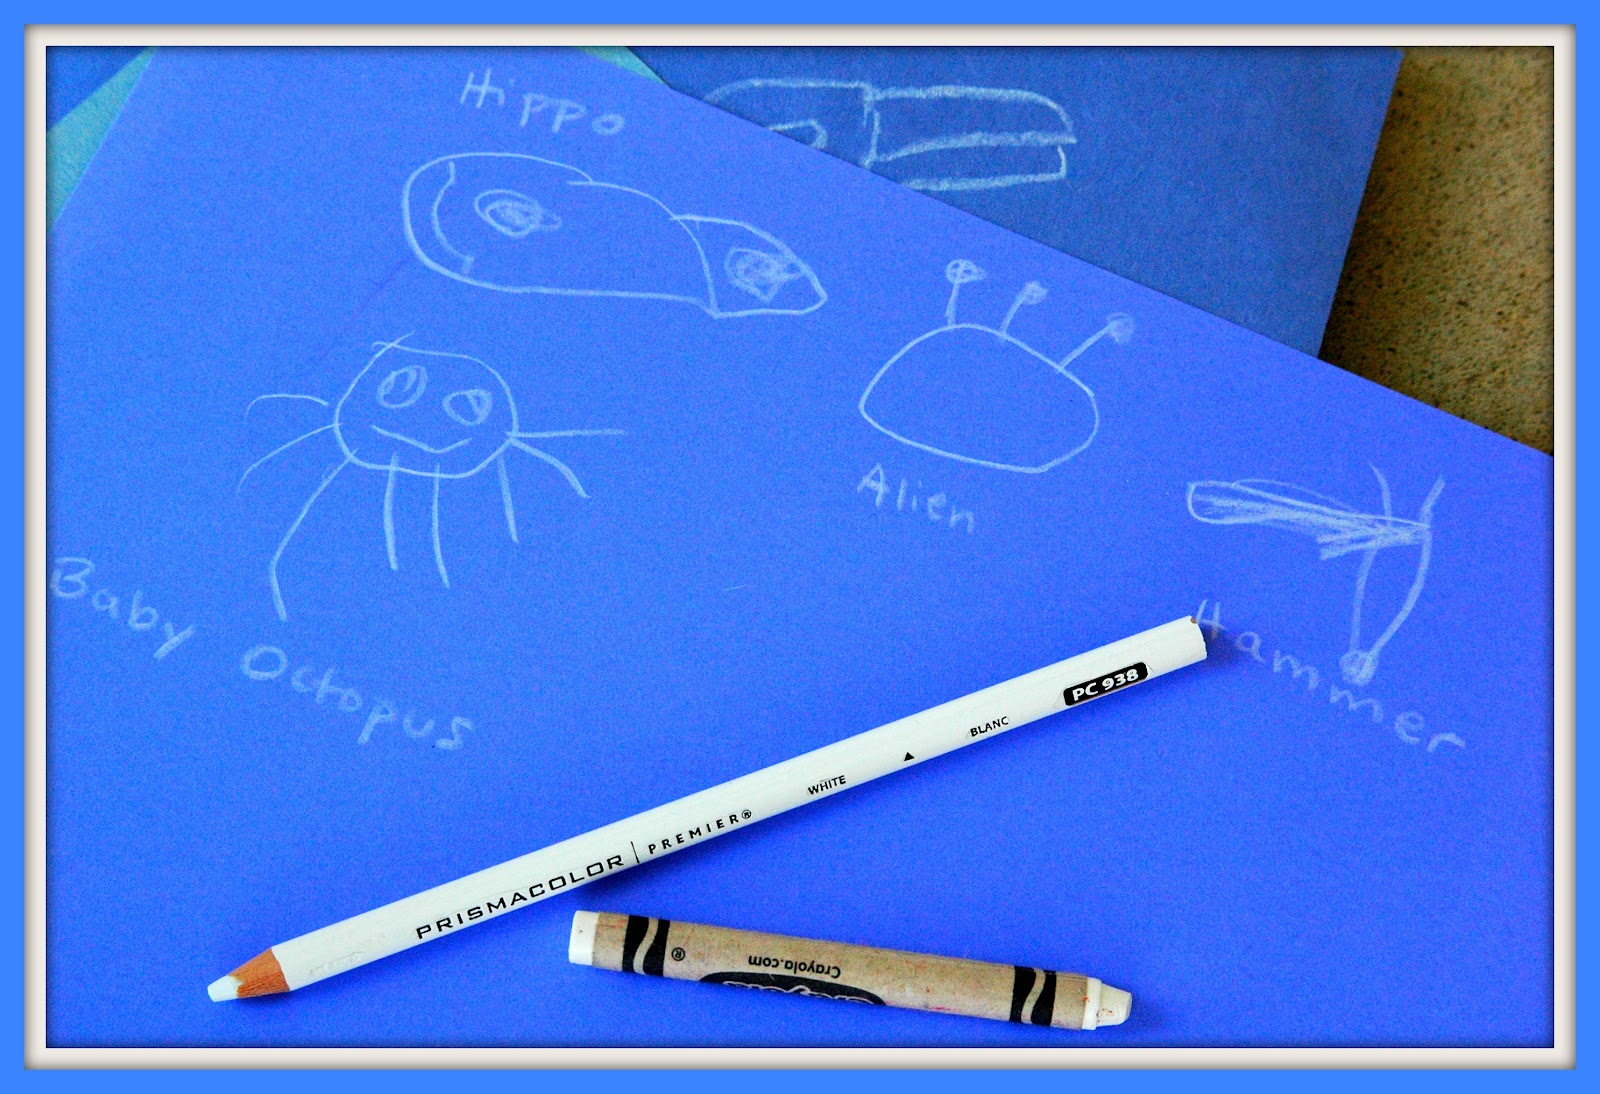
This activity was so interactive.  We talked about how the clouds change so quickly and why.  We also talked about our amazing Creator who makes each cloud unique and beautiful.  Why aren't all clouds the same size and shape? Why do we have clouds at all?  It was fun to see her really thinking and trying to take it all in.
**Artist Bonus**
If your child is older and interested in art, another idea would be to let them do a Contour Drawing of the clouds.  This is basically an outline of the cloud itself without filling the inside.  Another great exercise for any budding artist is Blind Contour Drawing which is a contour drawing that is done by only looking at the cloud and not looking down at the paper.  This will really work your child's fine motor skills and enhance their ability to process what is going on in their eyes and brain and eventually transferred onto the paper. Blind contour drawing is always a great way to practice drawing no matter what the object! 

Have fun with this--I enjoyed listening to all 3 kids pointing out cloud shapes all the way home from school today.  Look up at the sky, you won't be disappointed!

God writes the Gospel not in the Bible alone, but also on trees, and in the flowers and clouds and stars.
~Martin Luther 

Wednesday, February 22, 2012

Imagination Booster: Cardboard Box Doll House

My daughter spied an old wooden dollhouse in a thrift store last week that she begged to bring home...we decided to leave it there since it was in pretty bad condition. But since she has dollhouses on the brain now, I thought we'd work together this week on making a fun little home for her Barbies.


We had a perfect, extra-heavy square box around, and I pulled out the craft tub with fabric scraps, felt, lightweight wire, beads, chenille stems, a catalog, glue gun, and cardstock.

We turned the box on its side and cut off the top flap. She wanted the sides left for doors, and the bottom flap was left to extend the floor. For windows, I had her trace around a rectangle of scrap paper and then I cut them out with box cutters.

Now for the fun: decorating!!


She chose her favorite fabrics and we cut 2 rectangles of each. I turned the top edge under 1/2" and quickly stitched it to form a "rod pocket." Then I had my daughter thread both curtains on a chenille stem. I poked holes above and to each side of a window and poked the stem through.


Then on the outside, I hooked the stem through a paper clip on each end, which I had my daughter wind up tight to the box to hold the "curtain rod" securely in place.


Now the curtains could be opened or closed. She found a piece of ribbon and made tie-backs for one set.


For a mod little chandelier, we threaded a length of light-gauge wire through clear pony beads, looping it through each bead once, then coiled the length a few times to look like a light. A three-inch length of the wire was attached to the top and then poked through the ceiling. Again, we wrapped the wire around a paper clip to fasten it tight on the outside of the box. Admittedly, there was a little disappointment when it was discovered the light wouldn't actually work.


We had a piece of brick-colored felt that made a great fireplace. We cut it in half lengthwise, then used a black marker to draw a square at the bottom. We cut little "flames" out of red tissue paper, and yellow & orange felt (use what you have!). They were hot-glued over the black square to make a cozy fire.


For a mantle, we cut a rectangle of white cardstock and folded it to make a right triangle that could be glued in place. It took a couple of tries to get the angle right (my math teacher was right--I really WOULD use geometry after 9th grade!), but we finally got a straight shelf.

My daughter was then put in charge of Art for the room.


She drew a butterfly picture, which I "framed" by gluing it to black cardstock.


Then we shot a photo of one Barbie to hang over the mantle...I guess she's the tenant.

Cut-out catalog pictures function as more fireplace art.

The piece of checkered felt made a perfect area rug. Now we just need to make some cardboard furniture using Tara's clever suggestions
here.


The Barbies, homeless until now, are quite enamored with the new digs, although I overheard the blonde say she wants her own place too. Guess I better go search out another box....


Thursday, October 27, 2011

Imagination Booster: Leaf Art

If you're outside enjoying enjoying Autumn today, you may want to bring a few leaves back inside for a fun and easy art project.
We found some favorites, laid them out on a white paper, and then gazed at them for a bit. You have to tap your cloud-watching skills to see what animal or object each leaf resembles.


Glue them down when you know what they are, then use pens and thin markers to turn them into those imaginary friends.


Little sister's imagination is remarkably similar to big brother's!
Nature art is the best!

Monday, September 26, 2011

Imagination Booster: Lunch on a Pirate Ship

One day while running errands, we found a wide, sturdy cardboard box just begging for an adventure. So we brought it home, and after studying it on all sides this morning, decided it would be a PERFECT pirate ship.


I cut off most of the top flaps, leaving one short one for the front deck, then bent one long flap to make the hull, taping it all together with clear packaging tape. After much deliberation, we settled on a not-too-scary name for our vessel...The Sea Wolf

We added a dowel for the mast and my son created a Pirate flag from cardstock. And LOTS of glue.

I taped one side for durability, then hole punched it twice for the dowel to run through.


Everyone promptly ran to find their best pirate dress-up clothes...stripes, bandanas, eyepatch, jeweled swords...typical pirate duds.

I wasn't sure what pirates ate for lunch...but decided tuna "fish" sandwiches cut with cookie cutters, and cucumber Sea slices with cream cheese to hold fish crackers and seaweed (cilantro) were just the thing for Captain Mario, Pirate Pinkey, and our Little Messy Matey. 


So me 'n' these here scurvy scallywags drug our sorry keesters out t'th'ship'n'had us a grand great adventuaaarrr! 


Wednesday, September 21, 2011

Make Your Own Play Teepee!


Note: If you aren't into sewing, there is good news! TheMudPieMakers has opened an Etsy shop...we have custom teepees available for order! See side bar for a link.


A play teepee is a super-fun hideout, reading corner, or ready-made fort for pretend play! And I promise it's not hard to make. If you have a sewing machine and can sew a basic straight line...and you can find a free afternoon...you can make this! It will take 3-4 hours. It is fairly inexpensive as well...actually, it could be pretty much free if you repurpose a used twin sheet and are lucky enough to have bamboo growing in your yard.

I had neither of those, so my cost was $20, which included 2 sheets from Walmart ($5 each) and PVC pipes from Home Depot ($10).
Gather Materials:


  • 1 flat solid color twin sheet


  • 1 patterned twin sheet or 2 yards of any 45”w cotton fabric for contrast banner and pole pockets


  • matching thread


  • 37” length of single fold bias tape


  • 5 PVC or bamboo poles, each ¾” thick and 74 inches long


  • 10 caps for the PVC pipes


  • 1 shoelace or 24” length of cord or twine to tie the poles together


  • a drill with a 1/4” bit
Prewash your sheets.
Lay the solid-color sheet on the floor and use a measuring tape and pen to mark the triangles that will be the 5 sides of the teepee.


The far right triangle on the diagram, which is at the top of the sheet (where the big hem is) may vary a little in size...that's ok. It will form the door flap. Use a straight edge to draw lines between the marks. Now cut the triangles.


Lay out your contrast fabric. Cut 5 strips that are 60” long by 5.5” wide. These will form the pole pockets.


Cut a small triangle pattern piece for the banner that is 7x7x7.5" and 6" tall.


Cut 14 of them. These will form the pennant banner that is on the door flap.


Start sewing. *All seam allowances are 5/8” unless noted.

To make the front door section, overlap the 2 smaller triangle pieces. They should overlap 3" to 6", depending on length of your sheet. You will have to turn over the piece on the right so that the wrong side is up. The back of the hem will show in front, but it's not noticeable.
Overlap the two pieces (left wider hem piece over right piece) just enough so that together the bottom edge measures 36”. Make sure the overlap is same at top and bottom.


Pin together and mark a line 3 feet up from the bottom. This will be the top of the door.


The overlapped top piece can be cut to a point to match the bottom layer--up near the point. Now stitch along the upper edge and then along the overlap until the 3-ft mark.


Stitch across that line to attach the two layers and make the top of the door flap. It's a good idea to zigzag stitch this seam to reinforce it...it will get pulled on when doorflaps are opened.


Now, on this and the other four triangles, measure 9" from the top point down each side, mark and then cut that piece off the top.


Hem the top edge by folding it down 1/4” then 1/4” again and stitching. The bottom edge is already hemmed for you.


To sew the pole pockets, first hem the short ends of each, turning the end under 1/4” and then 1/4” and stitching. Do this to both ends of each strip.

Next, you will fold the pockets in half lengthwise with the WRONG sides together. Put this long strip between 2 of the teepee sides so that the RIGHT sides of the teepee pieces are on the inside, against the pole pockets. All the raw edges should be even.


The pocket piece should be just a 1/2” to an inch shorter than the teepee pieces on each end. Pin and then stitch all the way down. As you sew, you may need to gently stretch the bottom piece to make sure your top and bottom edges end up even. Be sure to reinforce the edges a good bit where you start and stop your seam-—I stitched back and forth about 6 times over a couple of inches at both ends to make sure it wouldn't easily pull apart with use.
Repeat this step 5 times, so that you end up with the pockets showing on the outside of the teepee.


If you like, go ahead and zigzag stitch or serge the edges of those long seams to neaten them up inside.


Now for the banner. Put 2 small triangle sections right side together. WIth a 1/2" seam allowance, sew along the edge of the 2 slightly shorter sides, pivoting at the corner.


Leave the longer side open. Cut off the corner close to the stitching to remove fabric bulk.


Turn inside, using a pencil or scissors to gently poke it out to a point. Press. Cut off the little points at the bottom edge. Top stitch each triangle on the two sewn edges.
Open up the piece of bias tape and fold one end down a half inch. Lay a triangle piece under this end so the raw, unsewn edge is in the fold of the bias tape. Pin.


Lay the other six triangles inside, slightly overlapping the corners. Adjust so they fit just inside the 2 ends and there is an inch of bias tape left at the end that you can fold up a half-inch to hide the raw edge. Now, fold the tape over, and start stitching through all layers from one end to the other.


Pin this banner on the inside of the wider hem flap. Sew from bottom to top about 5/8” from the edge, making sure you don't catch the other door flap in your stitching. Now topstitch again next to the edge.


To prepare your poles: each should be 74-inches long. They will have markings on them from the store, so you may want to spray paint them or wind colored tape around them to make them prettier.

Measure down 8” from one end of each pole and mark. Drill through both sides of the pipe at these marks. Insert the poles through the pockets of the teepee and put a cap on each end of the pole.


With the teepee and poles all bundled together, thread your cord through the drilled holes and tie it so it has just a little bit of slack. Stand your teepee up, spread the poles and adjust the tie as needed.


Furnish with a couple of good books, a little snack, and your children will have hours of fun in their new make-believe world!

Wednesday, September 7, 2011

A Shout-Out to Shrinky Dinks!


I  Shrinky Dinks. 
All weekend my husband made fun of me for talking about Shrinky Dinks nonstop--he thought I was making them up until we found them at AC Moore. The name is great! And the possibilities with this product are left entirely to the limits of your own imagination! Yes, it is hard to believe there is actually a product named Shrinky Dinks, but I assure you, that is what they are called. Here is the website!!!


Several weeks ago I stumbled across a neat charm bracelet on Pinterest that someone made by scanning in books and printing them on Shrinky Dink paper. I had never thought to do that before, so my mind started going crazy. My first idea was to create a "family album" using pictures of your child and loved ones to make a charm bracelet.
~~Shrinky Dink Charms Take 1!~~
Here are the supplies you will need: 

  • I found this film at AC Moore --  Shrink Film and comes in a packet of 6 sheets 11 X 8.5.
  • Please note the frowny face I inserted here. I thought my photo charm bracelet was award-winningly original.. evidently not. There was a photo of such a bracelet directly on the packaging--another notch down on the wall of creativity for me!
Here is how our first photo project went down.  I did not sand the film (even though the packaging recommended it.) It needs to be sanded.  
I also did not purchase the extra special printing ink that is made for this particular film. I don't think I would purchase the special ink unless I was really planning to go Pro with Shrinky Dinking. For now, I'll stick to amateur level.

At any rate, my normal printer ink never quite stuck to the film, resulting in a wet and tacky surface after shrinking :(
The little charms were so cute, I was bummed that they would not completely dry.  We moved on to Shrinky Dinks, take 2!
~~Take 2!~~
This time around, I sanded the film. Aah, much better. The film was more receptive to pencil, colored pencil, and marker. Hooray.  

Next, I printed out her name, traced it and colored it in. I also did a little "cartoon" of her face by tracing a large image.  Then I cut the letters leaving a little room around the edges.
In the meantime my daughter carefully drew and colored some special charms for herself!
You will need to have a hole punch to make the holes for your necklace rope or wire! Give yourself a little room at the top and place the punch where you want a small hole.

  •  To bake your Shrinky Dink Charms, preheat the oven to 300° or slightly warmer depending on your oven.  Place your "charms" on a baking sheet--the directions tell you to use wax paper, but I have had great luck placing them directly onto the sheet.
  • Wait until the charms curl slightly, then flatten back down.  Once they are flat, about 1/2 the size and much thicker, you can pull them out. It takes about 3 minutes.
  • Let them cool and if you need to flatten them a little more, use the tip of a spatula.


You can see how big they are here. If you want them smaller, just make smaller letters and pictures!
Here she is wearing her necklace. I ended up using some of my bead "hardware" to finish this up, but running a  stretchy Pony Bead string or fishing line through the center holes will make most kids happy! We will add more beads and glam to our necklace on another day.


We had a fun time. There is something magical and exciting about peering through the oven door, waiting to see how your artwork will change.  I will most likely be posting on Shrinky Dinks again, in the meantime I'd love to hear about some of your own experiments... and mishaps!!!