Showing posts with label quiet activity. Show all posts

Monday, April 16, 2012

Toddler Toy: Upcycle a Wipes Tub


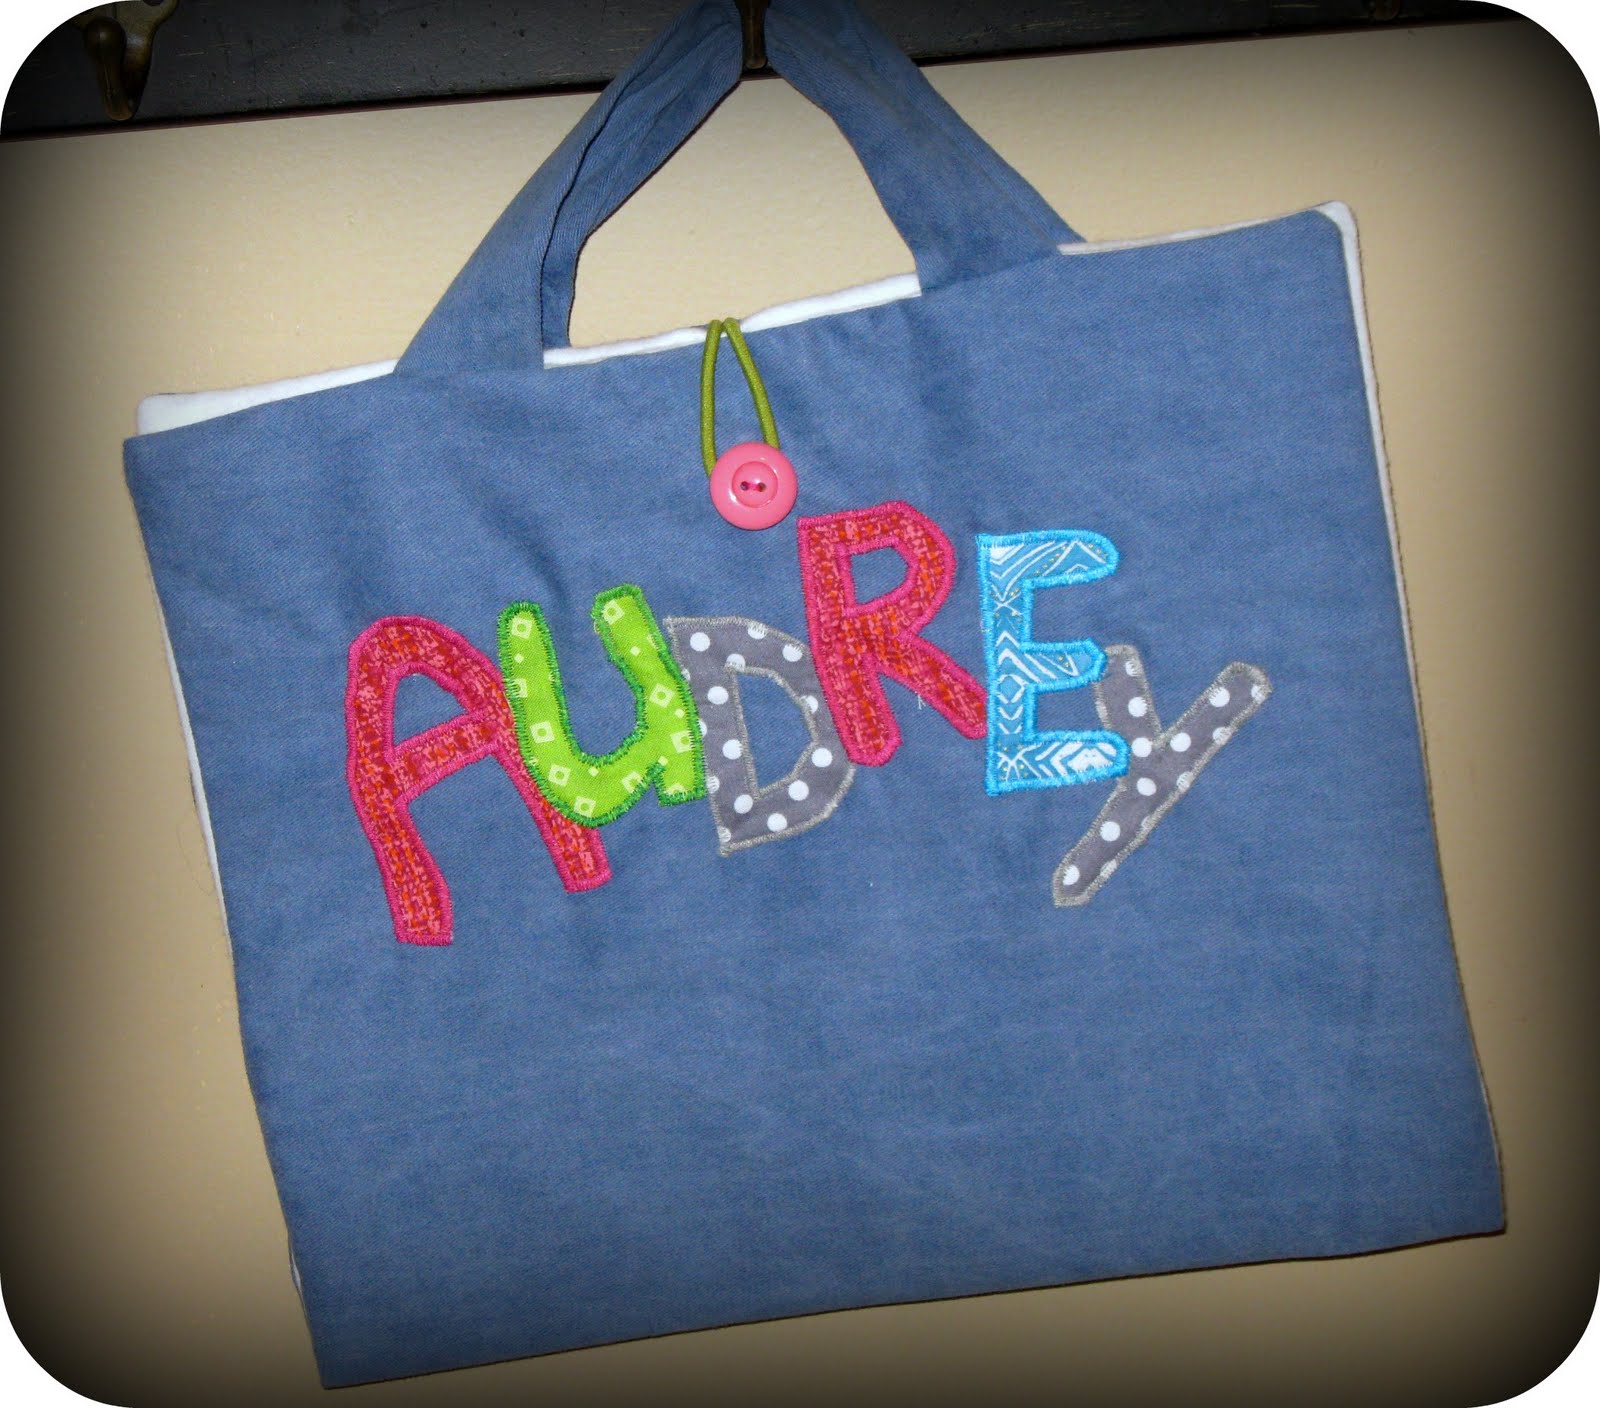
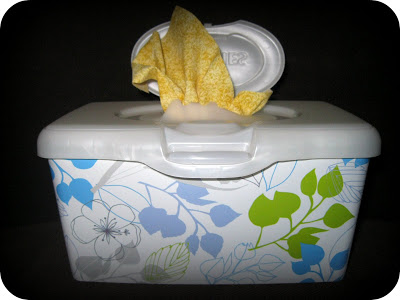
This Huggies wipes tub was just too cute to throw away! I decided to recycle it into a fun little activity for my 2-year-old. (Incidentally, I recommend the Huggies tubs over other brands because of the rubbery opening that is softer on little hands.) Ever left your toddler alone with a tissue box or wipes tub...to come back later and find it had been emptied one-by-one? Yeah. The fascination of one little white corner appearing after another...

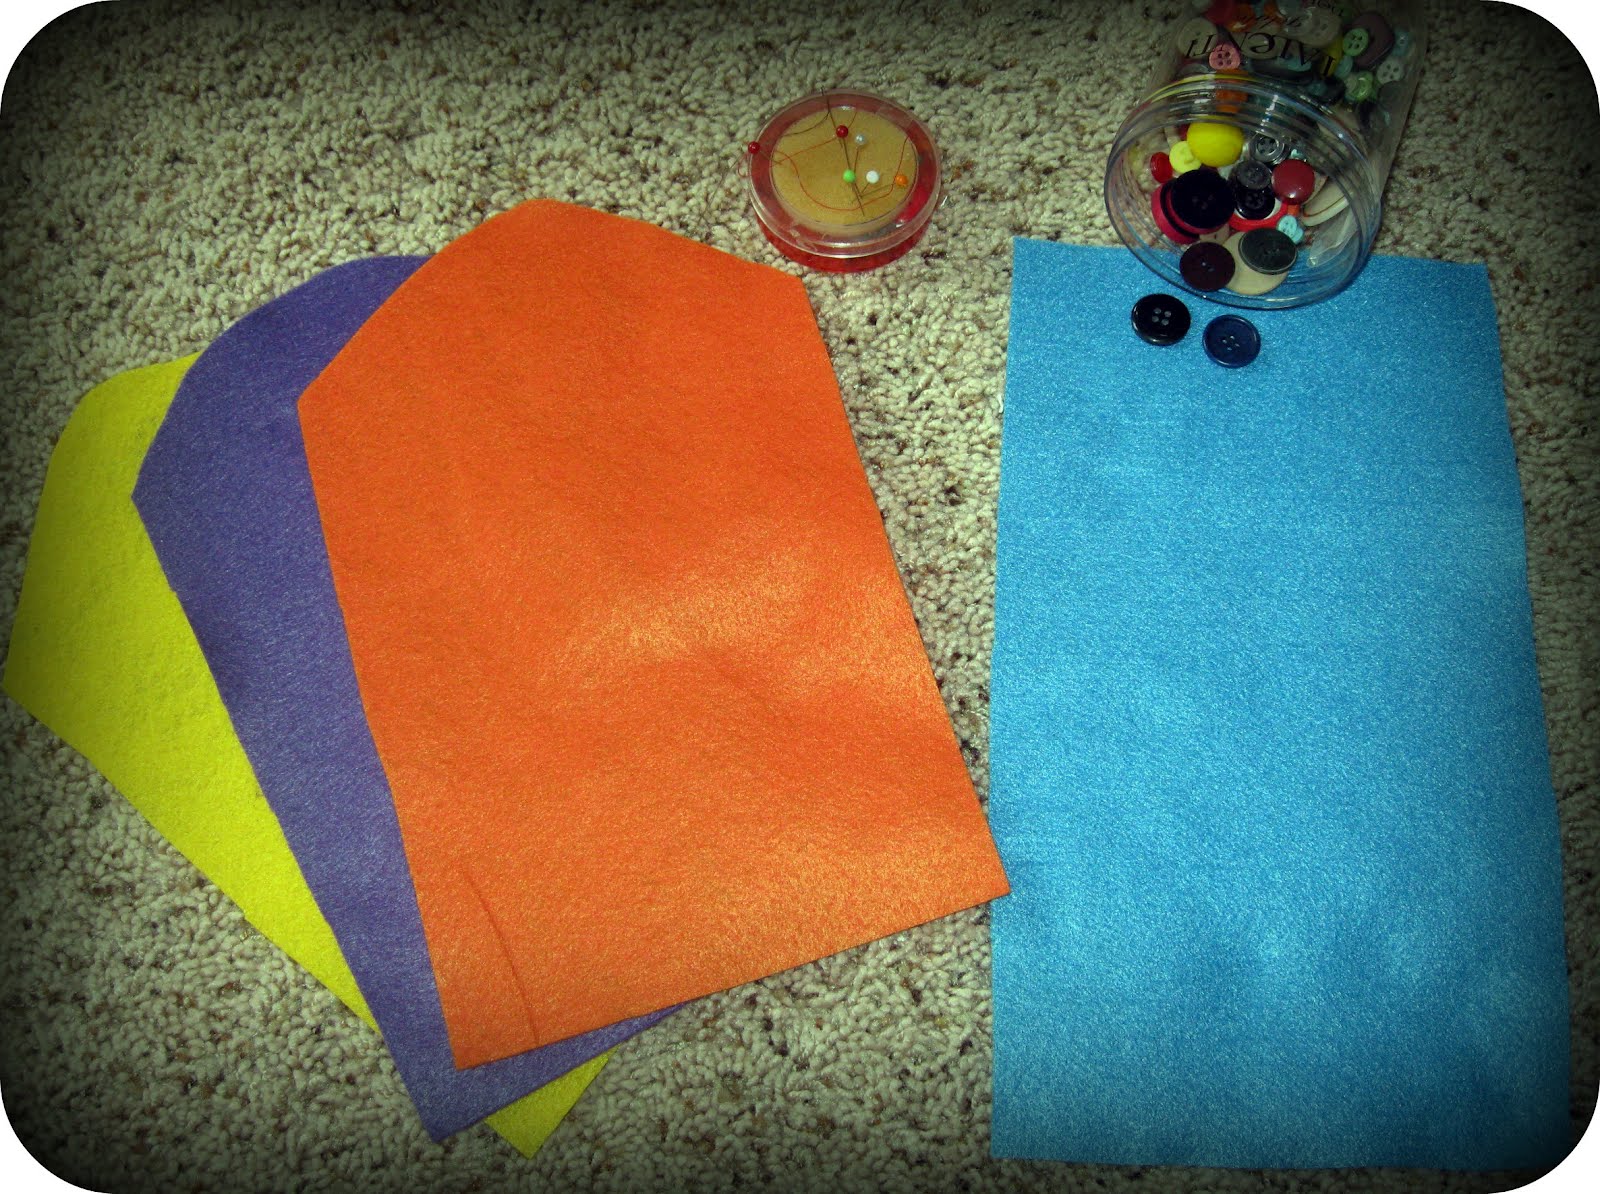
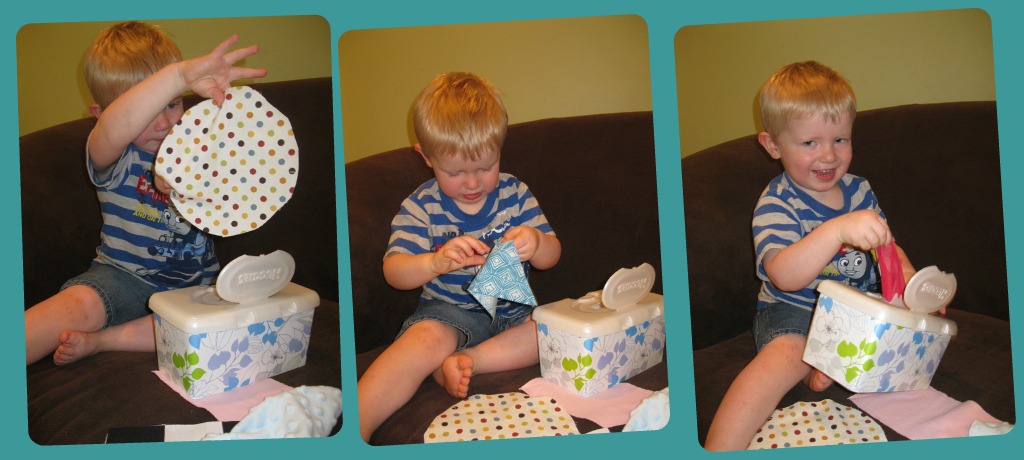
To fill my tub, I pulled out a bunch of fabric scraps and cut rectangles about the size of a small paperback book. I tried to find different colors and textures--velvet, satin, flannel, and corduroy.


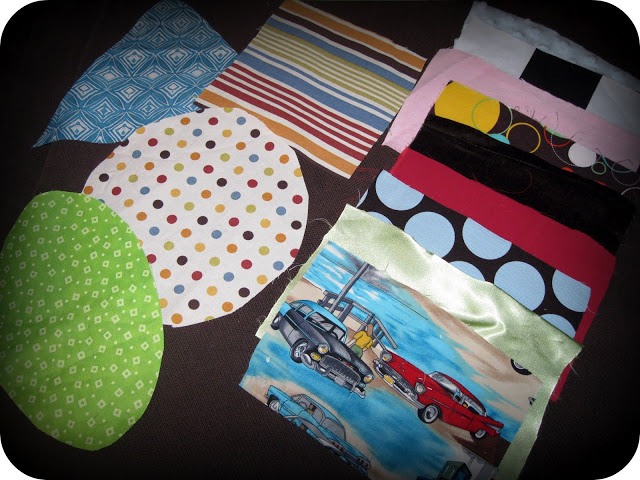
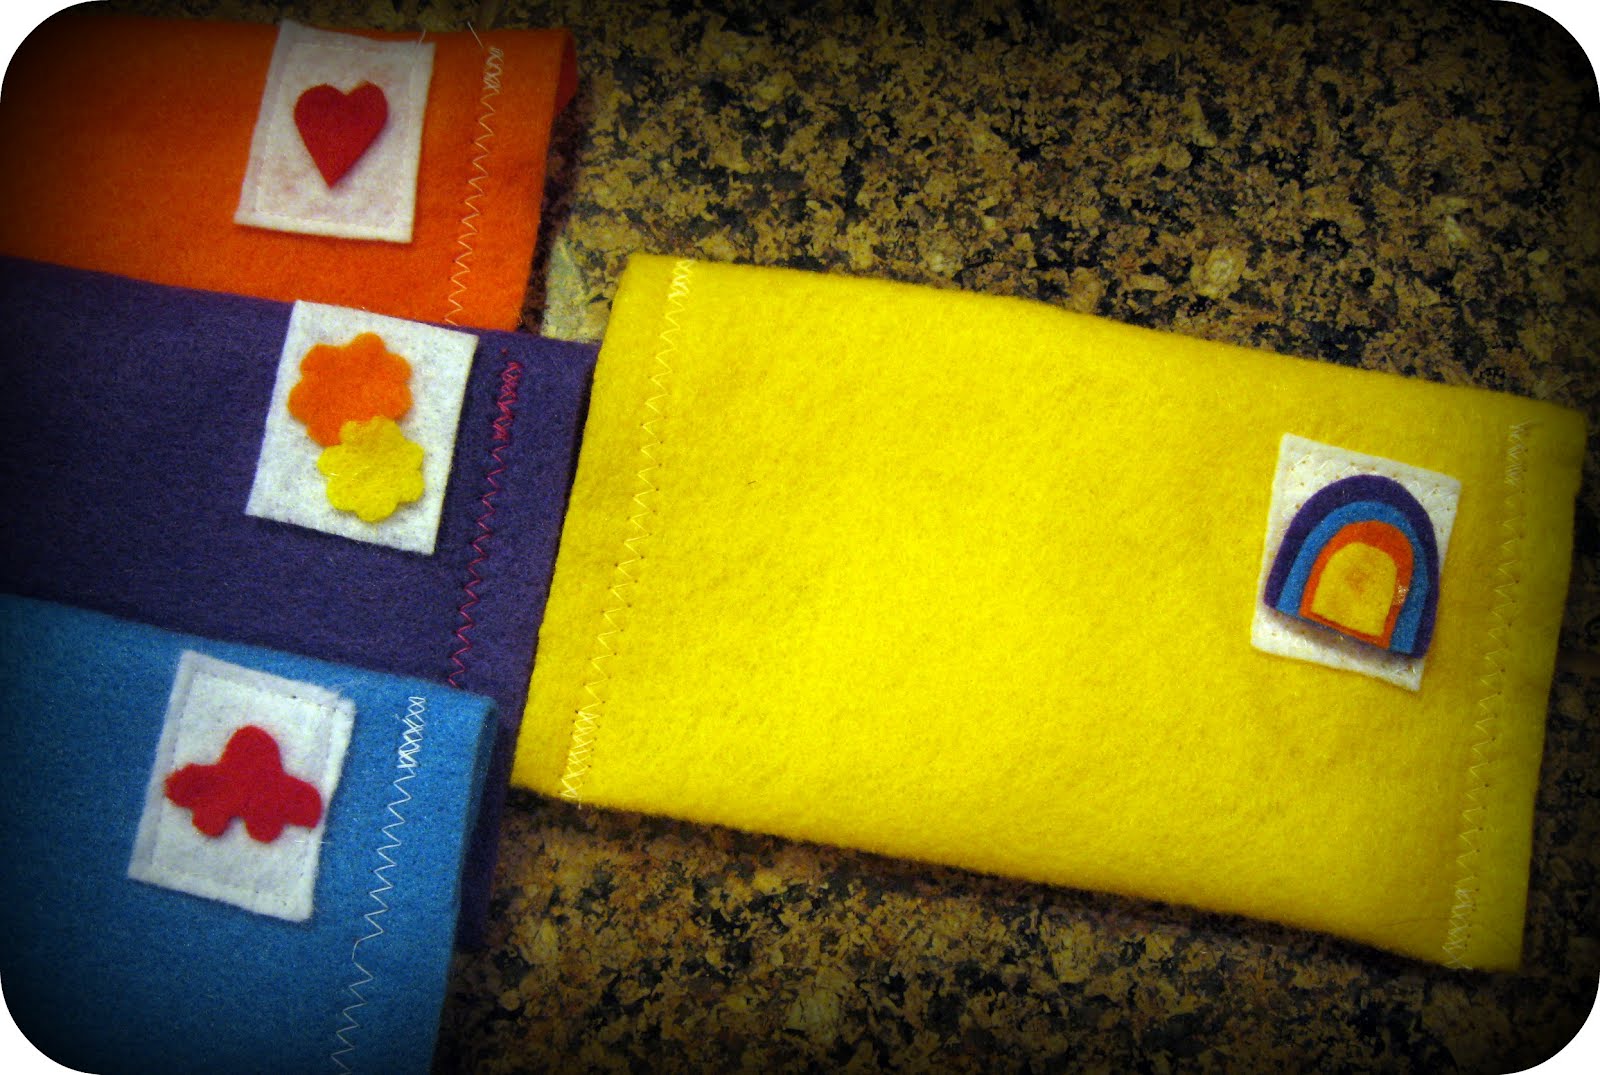
Then I cut some different shapes--oval, triangle, circle, heart, and square. I even pulled out a couple of my son's favorite old t-shirts that were in the rag bag because of holes or stains and cut out the front picture. This is a great option for anyone who doesn't have fabric around. The nice thing about t-shirt fabric is that it won't fray around the edges either.


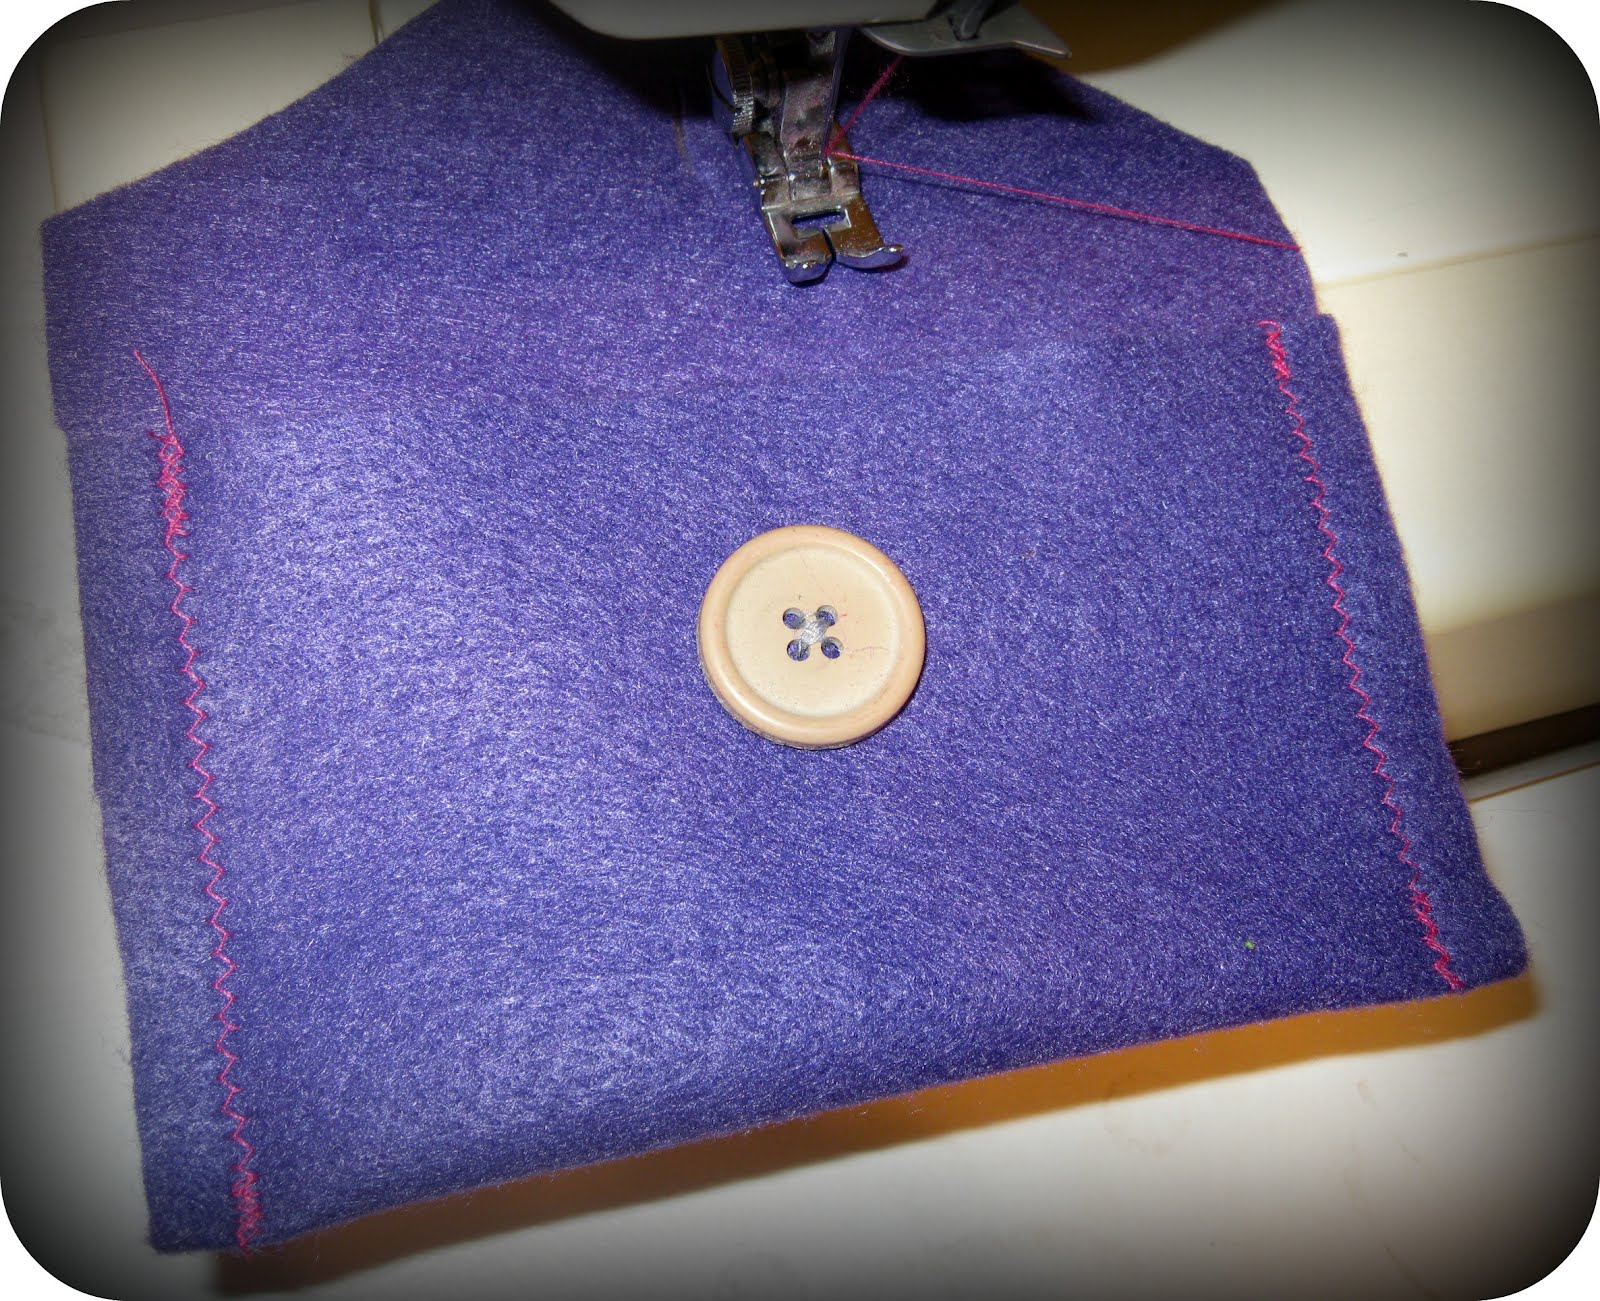
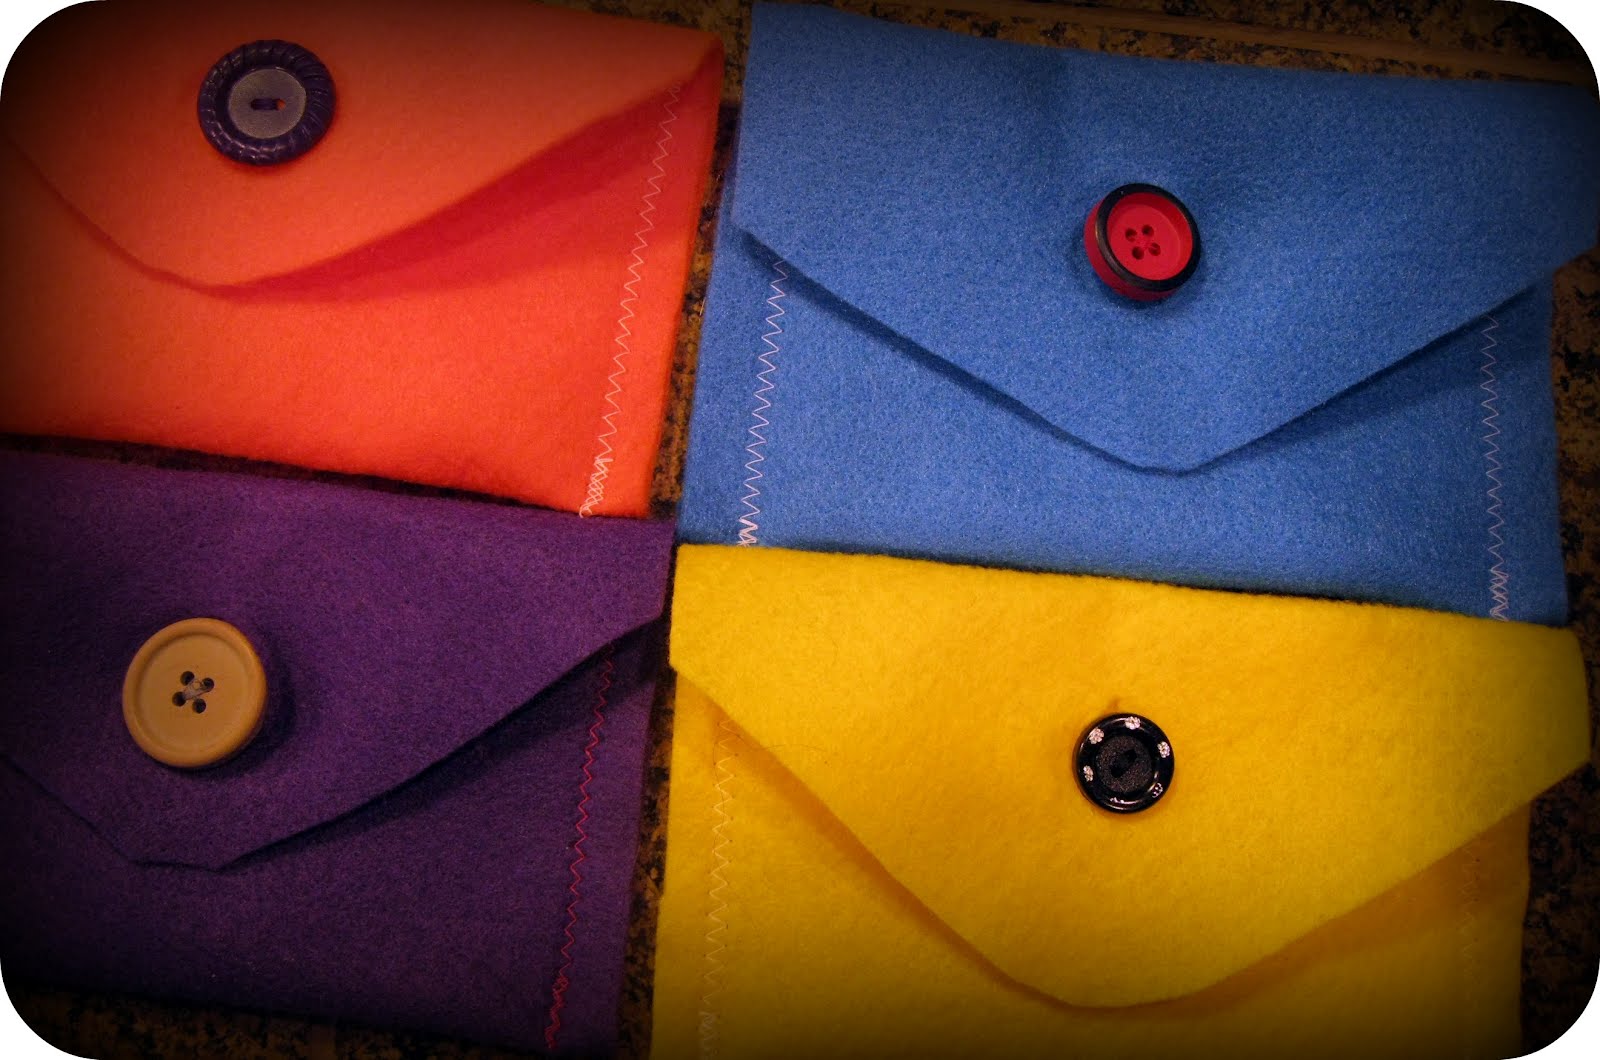
If you knew your child would play with this over and over, you may want to go to the trouble of hemming the edges of your cloths. I didn't bother.


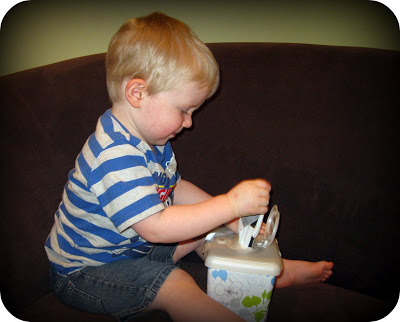
When I gave it to my son this morning, he had a lot of fun with it and got some good practice naming his colors and shapes. To keep it interesting, we made up games, such as "Find me the green cloth!" and "Sort the shapes."


It's a quick "toy" to make, and something that can be pulled out for Quiet play when Mom needs to make a phone call or fix a meal!

Tuesday, March 13, 2012

Pretend Play: Felt Mail Envelopes

My daughter needed a project one recent rainy day while her older brother was busy with school. Since she had just recently learned to sew buttons onto scrap fabric, I thought a "real" button sewing project would be fun for her...such as felt Mail Envelopes that the kids could use for pretend play afterwards.

These are super easy to whip up, whether you use a sewing machine or hot glue gun.

I cut 4 different colors of felt into 7" wide by 12" long rectangles. Then I angled one end to make it look like an envelope flap.


The button was to go on the end that still had square corners, about two inches down from the edge and centered. She chose her favorite buttons from my little jar and got to stitching. She was super careful and made sure the needle went back in the same side it came out...great progress from her first lesson!


Next I folded the end (with the button) up a little more than a third and stitched the side edges together. Hot glue would work great too, or a young seamstress could even hand stitch those seams.


Then I folded the Flap side down and cut a slit to fit over the button.


Finally, we cut out little felt Stamps and hot glued/stitched those on the front of our envelopes. 


They've had fun writing notes and delivering mail to each other. Best perk of this project: my sweet little love notes!


Saturday, February 18, 2012

Photo Fun: Make Your Own DIFFERENT PICTURE Game!

I've mentioned before that my kids spend many hours pouring over Where's Waldo and Seek and Find books.
Last week, as I was looking at some books, and some of the junky areas throughout our home, I realized it might be fun to set up the tripod and create a few Different Pictures from our own home!  This is a fun project that can be as simple, or as complex as you want to make it.  For our purposes today, I kept it simple. 

I set up the tripod in several areas of the house where there was plenty of messy detail and added an object here and there.  I chose to photograph the kitchen counter, a pile of laundry, a bookshelf, and a few things in the toy room.  If you don't have a tripod, you can still make it work but it will be difficult to take a photo in the same location without altering positions.
I took my first picture, then went in and added or removed objects.  It was fun trying to make some obvious changes, and other more discreet changes.  For example, in the kitchen I replaced a pop-tart box, opened the coffee pot, rolled down the paper-towel, flipped the banana tree, etc.  Depending on the age and observation abilities of your kids, you could add more difficult changes in your second picture.


I uploaded the pictures and put them in a collage format so that my kids could view them side by side.  If you don't want to mess with that, simply print 2 photos and let the kids view them next to each other.  Since I printed them on paper, I just let them circle the changes they observed and had them keep a tally on the side.  My big guy has been working on keeping tallies at school and they have been counting things all over the house lately. 
They had a great time observing all the differences and were especially thrilled when they caught something small that they didn't notice at first glance.  I was thinking that if you wanted to save computer paper and ink (or if you just have a lot of time on your hands!) you might even order some inexpensive prints and put your photos into a little book as a gift or for your kids to do in the car.  Another option is if you have any type of tablet, simply save the photos and let your kids make observations from the digital photos or on the computer itself.
This was a successful observation activity that the kids enjoyed and asked to do again!

Friday, December 16, 2011

Seek and Find Christmas Activities: Recycle your Mail!

If you are like us, December is the one time of year when we scurry down to the mailbox full of eager anticipation.  We love to see who has taken the time to actually send a Christmas card or a gift in the mail of all things.  In addition to our personal mail, my kids are still young enough to enjoy looking through the colorful catalogs and Christmas ads that we receive on an almost daily basis.  So, this year I decided to save ours in a pile and put them to use!
If you have any bright Christmas ads around, it's time to pull them out. Some of my favorites (for this project) are Kohls, Target, Toys "R" Us, and Pier 1, but even Lowe's, Pottery Barn or Sears, etc. will work!  It's a shame to just throw away all these bright and colorful magazine pictures.


Game #1
My kids love the "I Spy" books, and anything that has to do with searching and finding hidden objects.  I came up with this printable to give them a way to dig through the magazine pictures and use their observation skills along the way. I also love how these games force my kids to work together to find things.  If your kids are older and you want to make a competition out of it, I'm sure that would be fun, too!  
Go here to print this out, give them a catalog and a pen, and the rest is up to them.  The beauty of this activity is they can take a pen or Sharpie and circle the objects along the way inside the ad--they aren't hurting anything since it is already trash!  If your child is not reading yet, tell her to find the objects pictured on the page by herself and then help her find the rest.  Also feel free to make your own list or add to this one!  There are MANY things to choose from in these ads!
Game #2
This is a similar game but instead of circling the objects, let your child hone his cutting and pasting skills along with his observation skills!  Print this list, then give your child several catalogs, a blank piece of paper, scissors and a glue stick.  See if they can find the amount listed to the left (ex. 2 mugs of cocoa, 3 candy canes) or simply let them find one of each!  Depending on the age of your child, cutting and pasting 1 of each might take long enough.
Another fun Christmas catalog activity is to let your kids create some festive paper dolls or cut and paste a Christmas scene (fireplace, stockings, tree) into a room. My daughter LOVES doing this and is currently cutting and pasting her little Christmas room and family now.  If you want ideas on how to get started, check out this post.  Have fun making use of your colorful Christmas mail!

Monday, December 12, 2011

Free Printables: Pen & Paper Games!

So many exciting events, programs, and parties during the Christmas season. Not to mention shopping and appointments and road trips to visit family. Some of these can get a little long or tedious for children to sit through. Once the candy cane is crunched away, the doodling page is full, and the Christmas lights have lost their dazzle, these pen & paper games may help ward off the wiggles for a little longer!


The first game is a Scattergories type word game...scan the room for objects that begin with each of the letters, MERRY CHRISTMAS. Can be a competition with points scored for the number of letters in each word, and extra points for double words! Print it here.


Gingerbread Squares is a game you may remember from childhood. Requires 2 or 3 players, and they take turns drawing lines to connect the gingerbread men. Whoever forms a box with their line gets to put their initial inside. This is a great game to teach strategy to preschoolers--my 4-year-old loves it. It can be printed here.


Print a couple off and stash them in your car for some quick entertainment when an event or appointment drags out longer than expected!

Wednesday, November 16, 2011

Quick Craft: Craft Stick Puzzle


This is the cutest and easiest little puzzle idea! I've seen it in a couple of places and decided to give it a try. You may have the supplies already on hand: craft sticks (I used the wide ones), acrylic craft paints (or paint pens), brushes, masking tape, and a marker.


For my pictures, I searched online for Fall clipart image and printed out a few.


Line up 7 craft sticks tightly together and tape diagonally across the back.


Turn it over. Now you can either paint a background color, or leave the background natural and trace your shape with a marker.


The fun part: painting! I went with larger, simpler pictures since I didn't have a fine paintbrush or paint pen to work on small details. For younger children, you probably want pictures with more obvious detail (jack-o-lantern face would be easier than plain pumpkin). I outlined them with a black permanent marker again when they dried. My daughter could hardly wait to test them out after breakfast.


Wouldn't these be great for kid favors or busy activities at the Thanksgiving table? Or tuck a set in your purse for entertainment at a restaurant or appointment.
My kids saw the turkey pattern and are begging for it on a puzzle...I'm off to find a smaller paintbrush!


Tuesday, November 15, 2011

Quick Craft: Make the Most of Your Clothespins.

If you are like me, you lose chip clips as often as you lose clothes hangers and left socks. Where do they go? 
I can't answer that question, but I have found that it is handy to always keep a large bag filled with clothespins. They are cheap, they serve many purposes throughout our home, and I recently discovered that with a little extra care, they can put an ordinary chip clip or magnet clip to shame.  
Tools for the job:

  • clothespins (you can find these at most grocery stores and convenience stores!)
  • Mod Podge
  • Paint and brushes
  • Magazines
  • Magnets and strong glue (ex. Gorilla Glue or Krazy Glue)

This little project is very simple;  a basic, painted clothespin is fun, but a highly detailed, customized clip could turn into the finishing touch on a Christmas gift.  I started out by painting several of our clothespins with a bright craft paint (I chose blue and gold.)  I was fortunate to have some skewers which I used to hold the clips as I painted them. When I finished painting I stuck the skewers into some floral foam that I had on hand.  Obviously you can clip them onto anything (an old book, a cereal box, etc.) while you let the paint dry. The skewers worked really well.  
While your paint is drying, decide how you want to decorate your clips.  I saw some really cute painted clips, and I plan to paint some clips before Christmas, but it required more time and patience and tiny brushes than I had on hand yesterday.  This time around, I simply went through the ads in the Sunday paper and pulled out tiny Holiday images and words and set them aside.
Once the paint on your clothespins has dried, it's time to crack open your Mod Podge.  If you want your images and words to fit snugly onto the surface of your clip, simply lay the clothespin onto your image, trace it with a pen and cut it to the exact size of your clothespin.  Then put mod podge onto the clothespin and press the image firmly in place.  Mod Podge over the image and around the sides of your clothespin, let it dry and you are ready to go! 
My daughter painted several clips and decorated them with markers. She had a blast!
Like I said, this is a simple, easy way to add some Holiday flair to your chip clips or wherever you hang children's artwork.  This may also be a way to add something special for a teacher gift (cut out the letters of his/her name) or whenever you need to clip down a bag of Christmas cookies.
If you want to make your clip into a photo or memo holder for your refrigerator instead, simply buy a packet of magnets (less than $2 at any craft store!) and use superglue to attach the magnet to your clothespin. Once the magnet has dried you have a great way to display any seasonal artwork!
This was a fun little project and I intend to paint a few more clothespins before Christmas Cookie season is here!

Wednesday, September 7, 2011

A Shout-Out to Shrinky Dinks!


I  Shrinky Dinks. 
All weekend my husband made fun of me for talking about Shrinky Dinks nonstop--he thought I was making them up until we found them at AC Moore. The name is great! And the possibilities with this product are left entirely to the limits of your own imagination! Yes, it is hard to believe there is actually a product named Shrinky Dinks, but I assure you, that is what they are called. Here is the website!!!


Several weeks ago I stumbled across a neat charm bracelet on Pinterest that someone made by scanning in books and printing them on Shrinky Dink paper. I had never thought to do that before, so my mind started going crazy. My first idea was to create a "family album" using pictures of your child and loved ones to make a charm bracelet.
~~Shrinky Dink Charms Take 1!~~
Here are the supplies you will need: 

  • I found this film at AC Moore --  Shrink Film and comes in a packet of 6 sheets 11 X 8.5.
  • Please note the frowny face I inserted here. I thought my photo charm bracelet was award-winningly original.. evidently not. There was a photo of such a bracelet directly on the packaging--another notch down on the wall of creativity for me!
Here is how our first photo project went down.  I did not sand the film (even though the packaging recommended it.) It needs to be sanded.  
I also did not purchase the extra special printing ink that is made for this particular film. I don't think I would purchase the special ink unless I was really planning to go Pro with Shrinky Dinking. For now, I'll stick to amateur level.

At any rate, my normal printer ink never quite stuck to the film, resulting in a wet and tacky surface after shrinking :(
The little charms were so cute, I was bummed that they would not completely dry.  We moved on to Shrinky Dinks, take 2!
~~Take 2!~~
This time around, I sanded the film. Aah, much better. The film was more receptive to pencil, colored pencil, and marker. Hooray.  

Next, I printed out her name, traced it and colored it in. I also did a little "cartoon" of her face by tracing a large image.  Then I cut the letters leaving a little room around the edges.
In the meantime my daughter carefully drew and colored some special charms for herself!
You will need to have a hole punch to make the holes for your necklace rope or wire! Give yourself a little room at the top and place the punch where you want a small hole.

  •  To bake your Shrinky Dink Charms, preheat the oven to 300° or slightly warmer depending on your oven.  Place your "charms" on a baking sheet--the directions tell you to use wax paper, but I have had great luck placing them directly onto the sheet.
  • Wait until the charms curl slightly, then flatten back down.  Once they are flat, about 1/2 the size and much thicker, you can pull them out. It takes about 3 minutes.
  • Let them cool and if you need to flatten them a little more, use the tip of a spatula.


You can see how big they are here. If you want them smaller, just make smaller letters and pictures!
Here she is wearing her necklace. I ended up using some of my bead "hardware" to finish this up, but running a  stretchy Pony Bead string or fishing line through the center holes will make most kids happy! We will add more beads and glam to our necklace on another day.


We had a fun time. There is something magical and exciting about peering through the oven door, waiting to see how your artwork will change.  I will most likely be posting on Shrinky Dinks again, in the meantime I'd love to hear about some of your own experiments... and mishaps!!!

Thursday, August 11, 2011

Fuzzy Felt Quiet Toy Tutorial


A Fuzzy Felt shape set is a great Quiet toy to keep a little one busy. You can make an easy flannel/cardboard set, but it can also be upgraded a bit with a carry case to make a nice gift for a little friend with a big imagination. The appliqued name takes a little time...a quicker variation on that could be felt letters that are straight-stitched onto the side with one color of thread.


Materials: Denim or other durable fabric for carry tote, flannel, 3-4 colorful fabric scraps of fabric or felt for name applique letters and pocket, fusible webbing, 2 buttons or velcro, various thread colors, 2 sheets of heavy plastic canvas, felt squares in various colors, ponytail holder, scissors.


To make the fold-up carry case, cut a large denim rectangle (22.5" x 14") and 2 smaller white flannel rectangles (11.5" x 14").
Cut 2 narrow rectangles of denim for handles (10" x 3.5").
Cut a rectangle of colored fabric for a pocket (9.5" x 8")
Cut name letters from scraps of colored fabric and iron them to fusible webbing for applique.


First, machine applique the name letters onto the outside of the denim—fold denim in half and turn so the fold is at bottom and then place the letters where you want them. Pin, open denim, and machine applique.


I pinned a rectangle of scrap fabric to the back of the denim to give more durability.


For the pocket: Turn under one long edge of the pocket and zigzag stitch. Now turn the zigzag edge approx. 1 inch down, right sides together, and stitch from top folded edge down to the zigzag edge, leaving a 5/8” seam allowance. Repeat on other side.


Cut the extra fabric at the corners and then turn the pocket edge right side out. Press. If desired, make a buttonhole in the top edge...or sew velcro to the pocket and case.


Pin the pocket to the outer side of the denim so the folded edge of denim is at bottom. Stitch around the 3 sides of the pocket, leaving top open.


To make handles, fold one strip of denim lengthwise and sew down the long edge, leaving a 5/8” seam allowance. Turn it right side out. Repeat with other handle. Press flat so seam is in middle of strip.


Attach one handle to one outside top edge of the carry case, with the seam up on each. Check placement so both sides match. Stitch close to edge.


Turn one long side of flannel in 1/4” and zigzag stitch. Repeat with other piece of flannel.


Now pin the flannel to the denim case, right sides together. Be sure handles are tucked inside.


Also, at this point, you will want to add a loop for buttoning the case closed. Grab a ponytail holder and pin it between the denim and flannel so the big loop is down inside the case like the handles. Pin it so you can stitch across it.


Place the zigzag edges of the flannel in the middle. These will be left open to insert the stiff plastic canvas. Stitch all around the outer edge of the case and flannel with a 5/8” seam allowance. Stitch back and forth across the handles and loop a couple of times to make them secure. Clip corners to reduce bulk. Turn right side out.


Sew a button to the outside for the loop to close over. Sew another button under buttonhole of pocket.


Trim the 2 sheets of plastic canvas to fit inside. Insert. If desired, stitch across the open edge of the flannel to attach it to the denim. I decided to leave mine open so the plastic can be removed and the case is washable. It's snug enough that the plastic won't come out.


Finally, cut out felt shapes to play with...I searched online for simple silhouettes of animals and cars and things, and then adjusted the size before printing and cutting them out for patterns. Lots of geometric shapes are great too. Put the shapes in the pocket and your Fuzzy Felt set is ready for play!